- Brief Introduction
- Requirements
- Configuration of Live Chat in Admin dashboard
- Admin Configuration
- Configuring Twalk JS from admin end
- Configuring TwalkJS from vendor end
- Configuring WhatsApp from admin end
- Configuring WhatsApp from vendor end
- Configuring Facebook Messenger from Admin end
- Configuring Facebook Messenger from vendor end
Brief Introduction #
Turn all your skeptic website visitors to potential customers with a seamless Live Chat Module presented by MultiVendorX. This Live Chat module allows vendors to have real-time chats with customers, resolving all their doubts and queries. From email marketing to social media chats, you can employ any technique to reach out to your target audience in no-time. Apart from this, you can access additional features like exchanging images for references, sharing shop or home addresses, and tracking previous chat conversations.
So for a super-duper all-in-one extension like Live Chats, let’s get started with it’s easy to setup tutorial.
Requirements #
MultiVendorX
MultiVendorX Pro
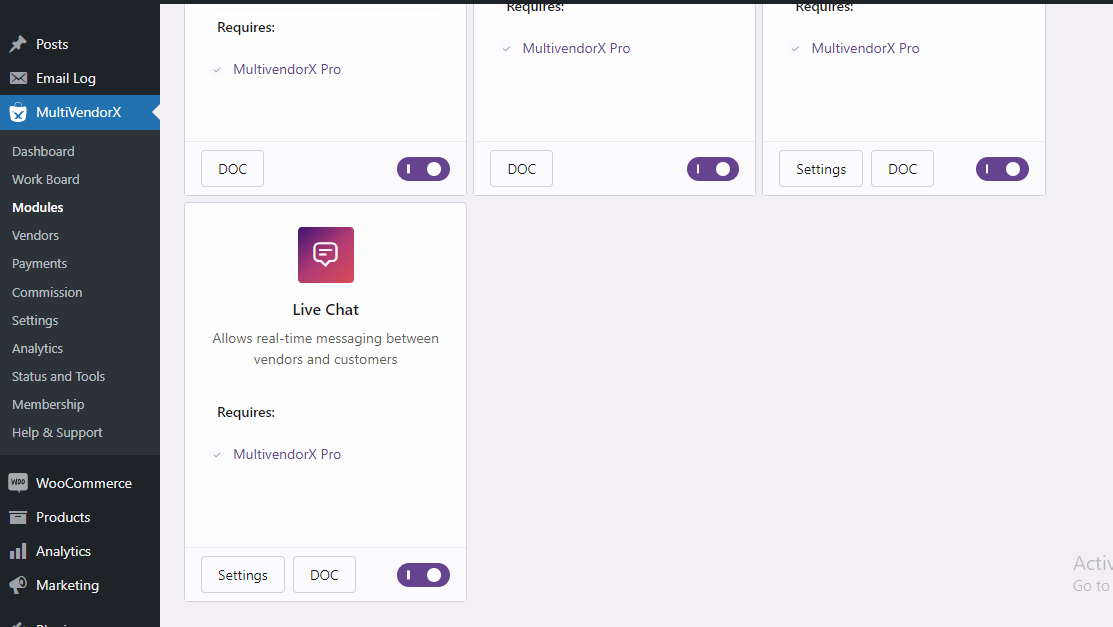
Configuration of Live Chat in Admin dashboard #
Go to MultiVendorX–>Modules–>Store Component–>Live Chat,enable the option.
Admin Configuration #
Setting up a live chat module for your site can be easy and effortless. All you need to do is –
- Go to the Admin dashboard and navigate to MultiVendorX. F
- On the Settings page, go to the Live Chat Tab and enable the Live Chat option.
- For the next step, MultiVendorX lets you choose your desired chat providers. These options include-
- Talk Js – With the Talk Js chat provider, vendors can start conversing with customers almost instantly. They also store chat information in their dashboards for reference purposes.
- Facebook – This option is a combination of social media and marketplace. So, vendors now have an alternative use for messenger as a business assistant.
- WhatsApp – You have the option to use WhatsApp to chat one on one with your customers
- Chat Button on Product Page option will let you display the Chat Button for any of these options :
- Add to Cart Button
- Vendor details Tab
- Hide
Configuring Twalk JS from admin end #
- The following step depends on your chat provider option. In case Talk Js is your chat provider, you would need to fill in your API Credentials. Don’t worry it’s not that complicated. All you need to do is get your keys and fill in your –
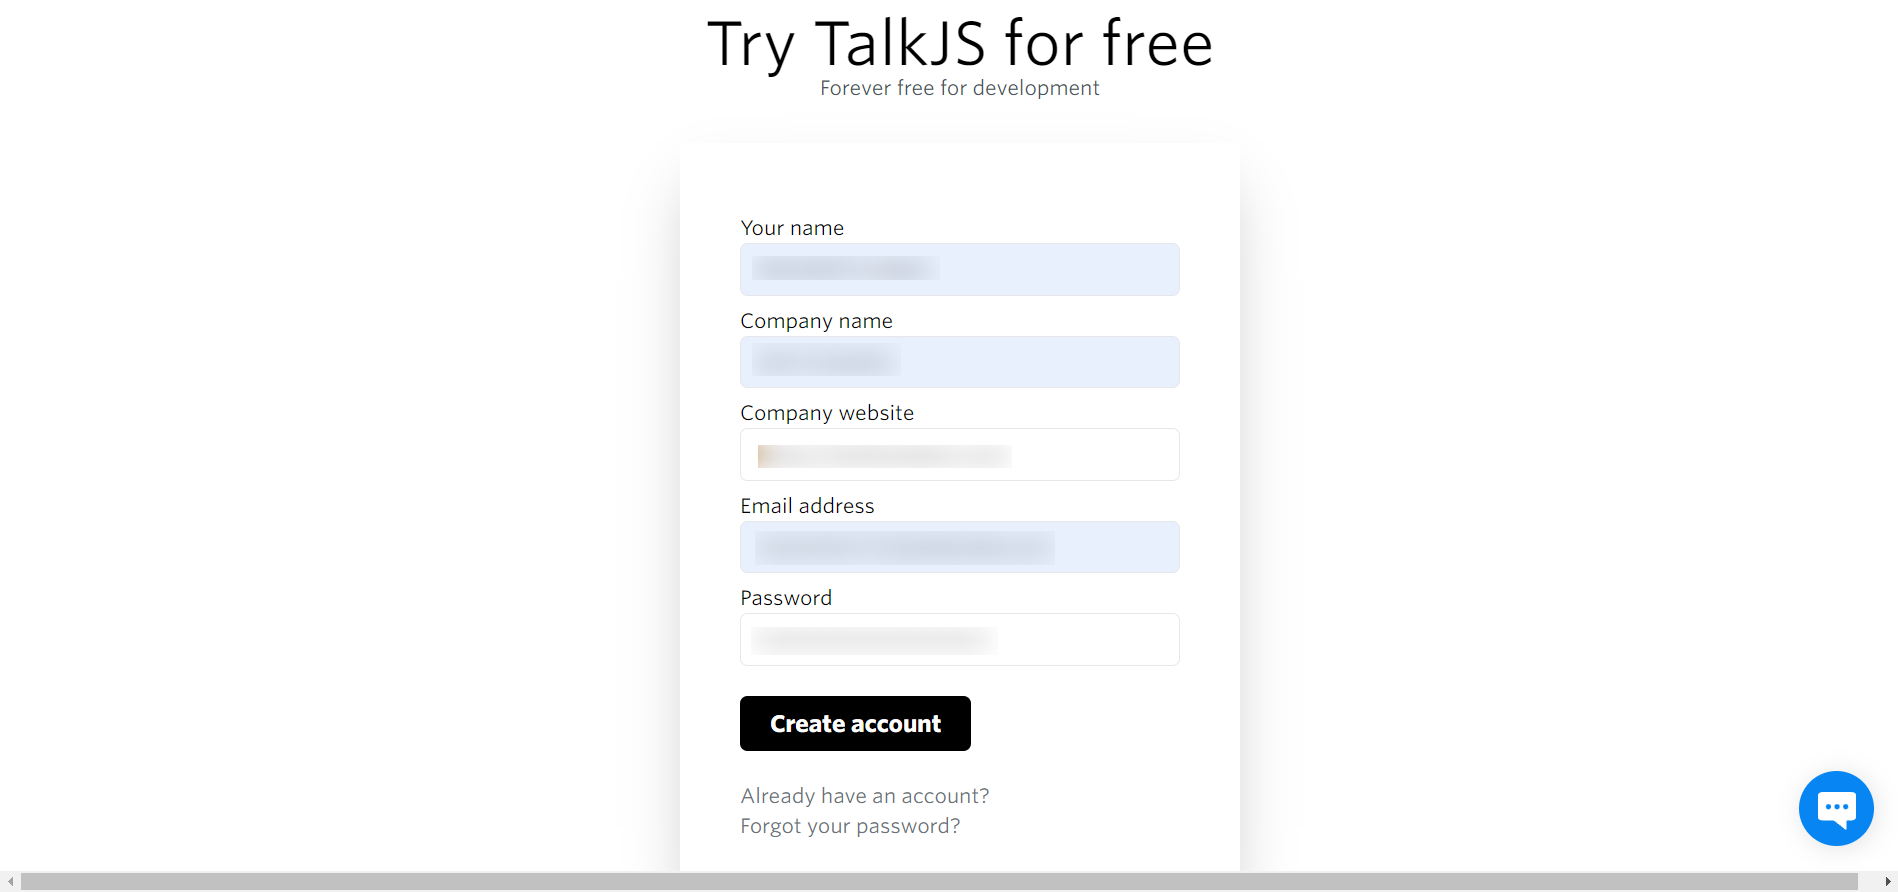
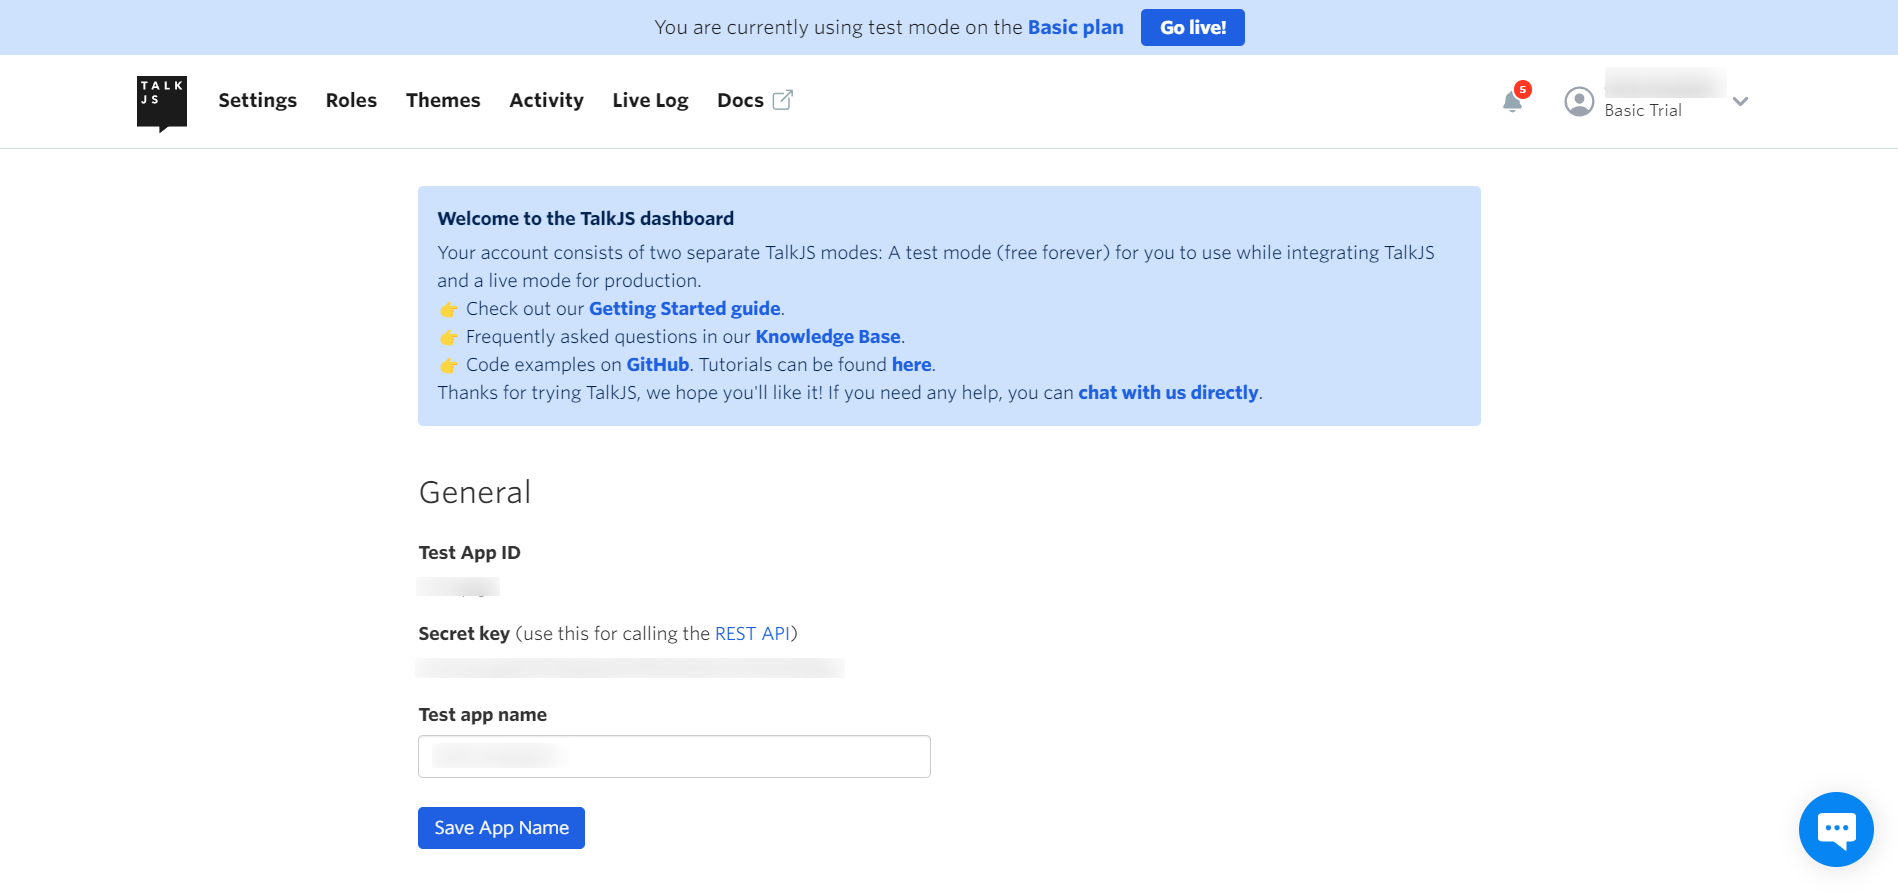
- API Id – You can receive your API id by setting up a free Talk Js account. Copy the test API Id that appears as soon as the account is created and paste it here.
- API Secret – You can receive the API secret similar to the API id. Repeat the previous step and paste the API secret here.
Configuring TwalkJS from vendor end #
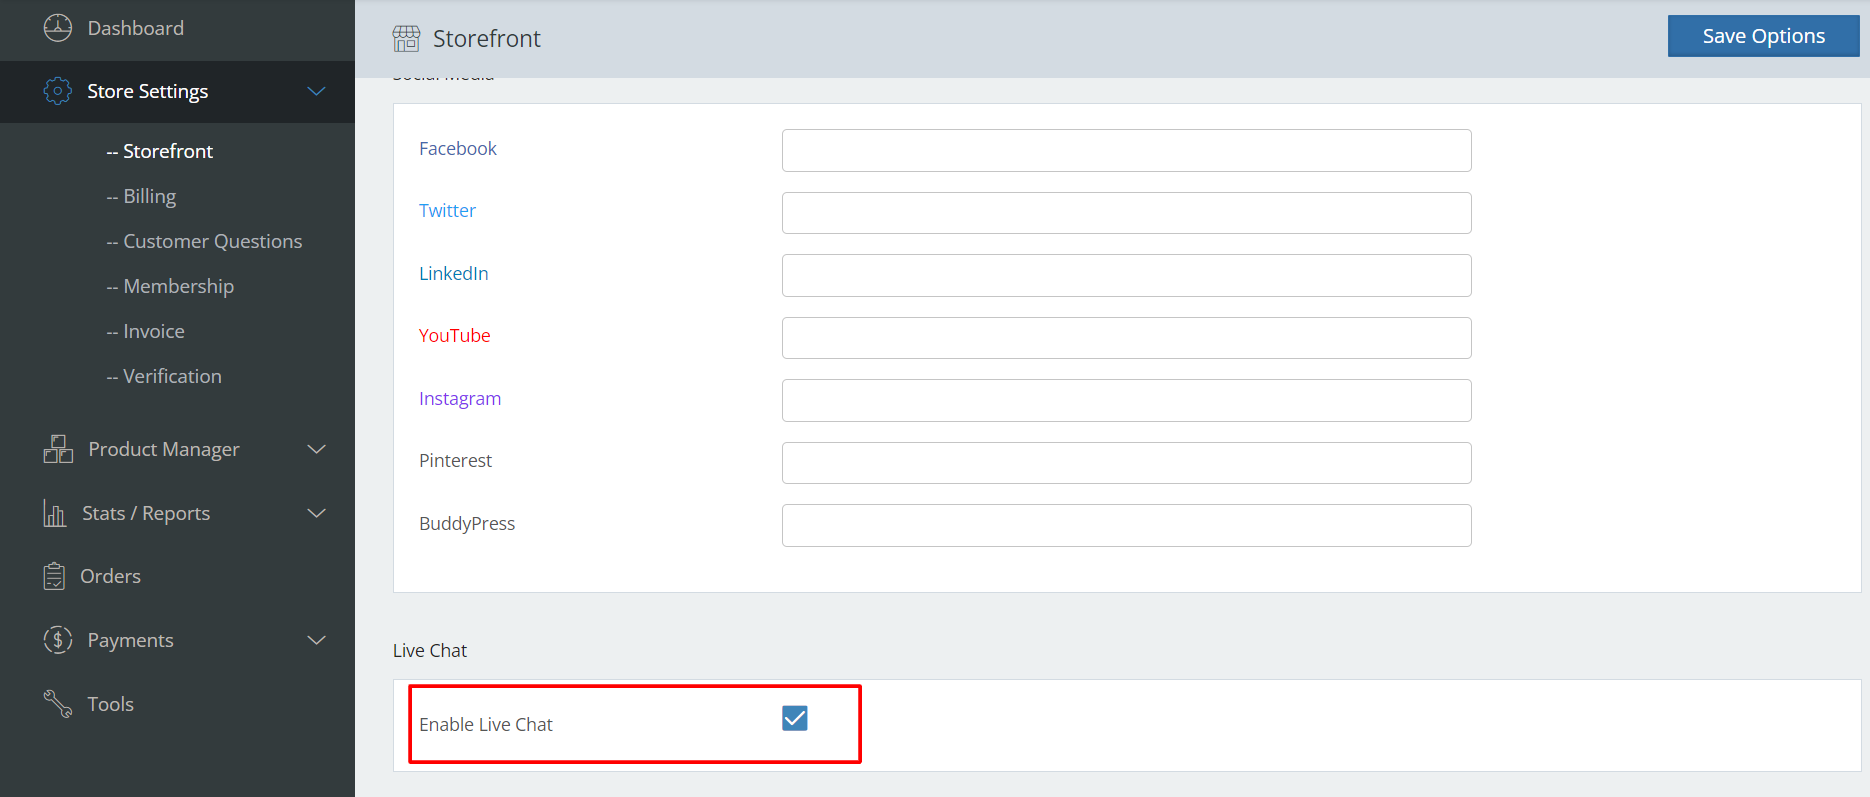
1. From the vendor’s end, vendors need to navigate to Vendor Dashboard>Store Settings. Now, scroll down and enable the Live Chat option.
Note: Vendor must activate the Enable Live Chat checkbox for the chat option to appear on his store page and product page.
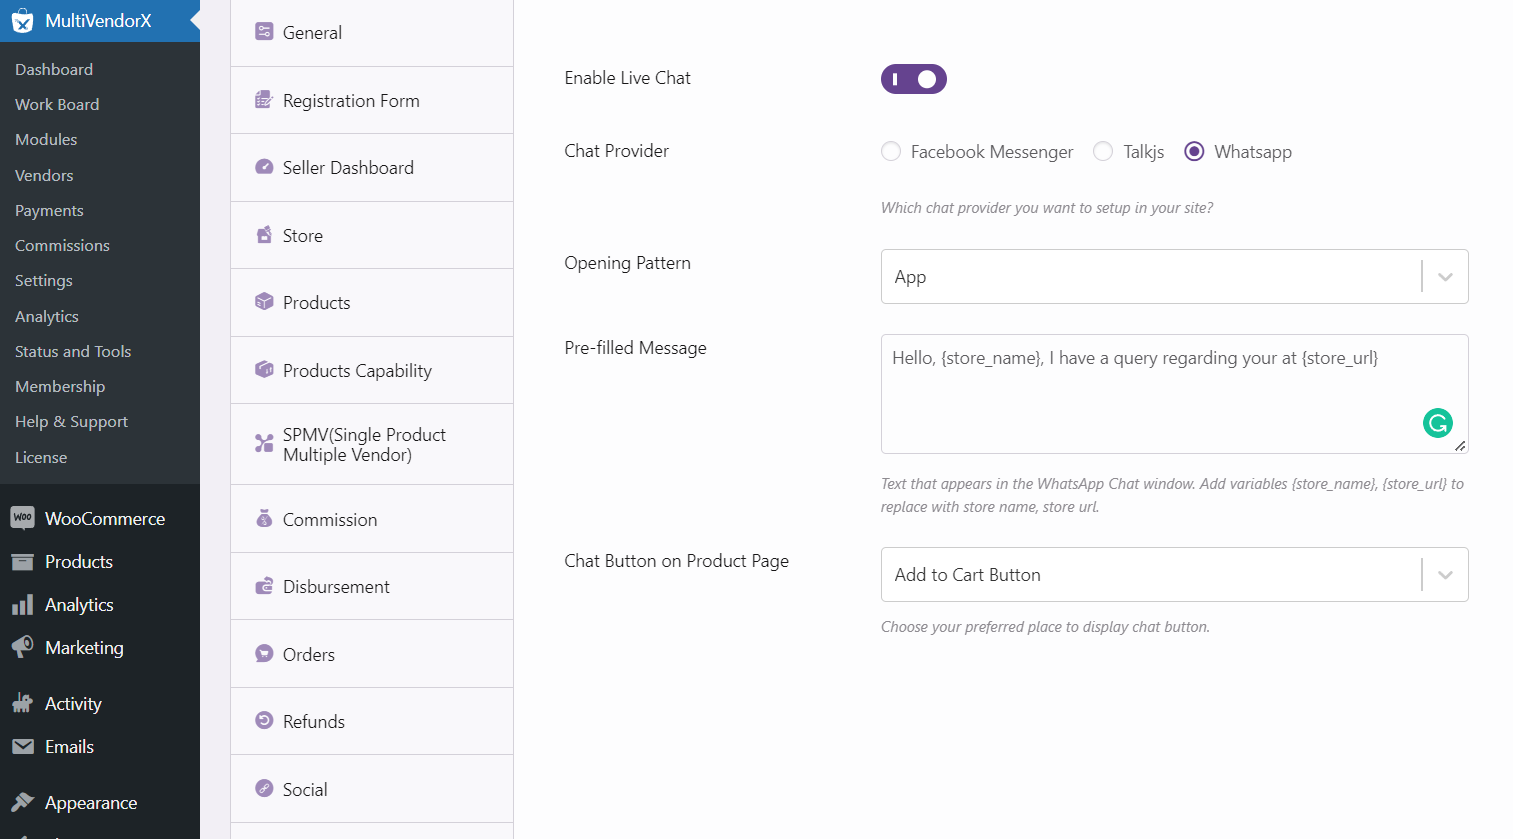
Configuring WhatsApp from admin end #
The admin or the owner of the marketplace doesn’t need to do much. He/She just needs to enable WhatsApp from the dashboard.
- If you have the WhatsApp application installed in your device, the you should choose APP, otherwise you can choose Browser.
- You will see that there is a pre-filled messages with some templates. You will get shortcodes {store_name},{store_url}. That means, when someone knocks on your store, you will receive the store name and store URL.
Configuring WhatsApp from vendor end #
Vendor need to add your WhatsApp number on your store settings.
Go to your vendor dashboard and click on Store Settings. Now, scroll down and enable the Live Chat option. Then add your WhatsApp number in the textbox. Click on Update Settings to finish.

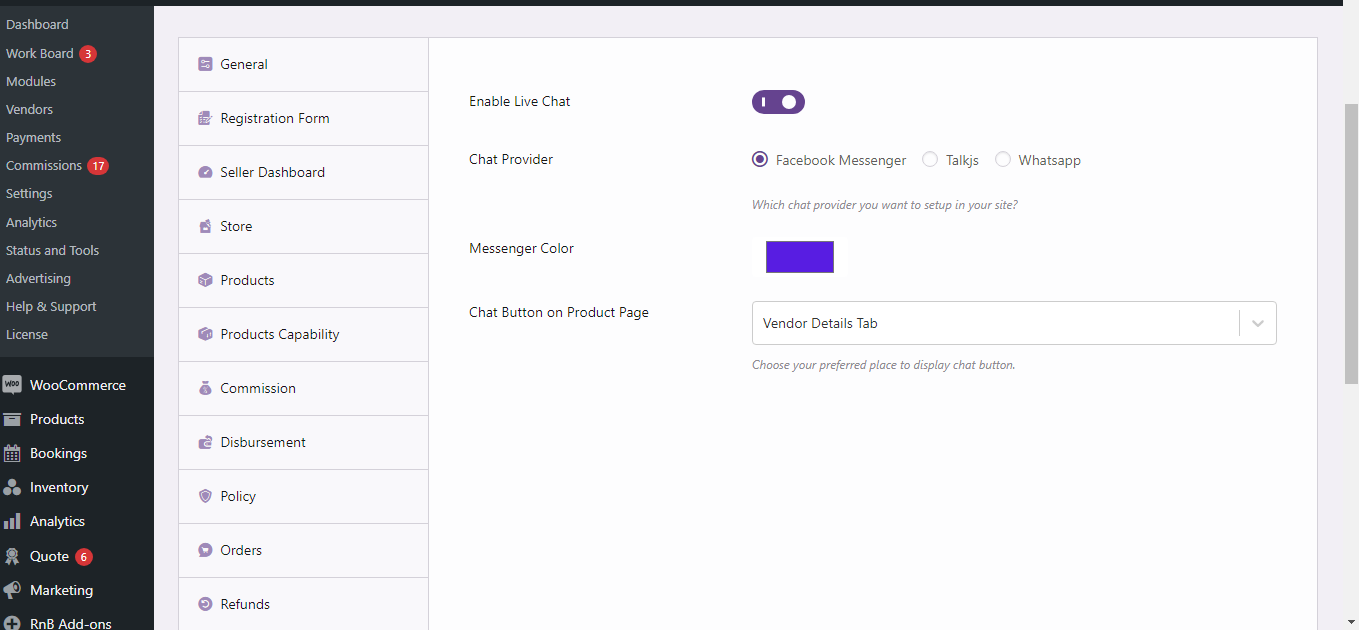
Configuring Facebook Messenger from Admin end #
The admin has very less to do from his side. He / She just needs to choose Facebook Messenger as the chat provider, select messenger color and position for the chat button on the product page.
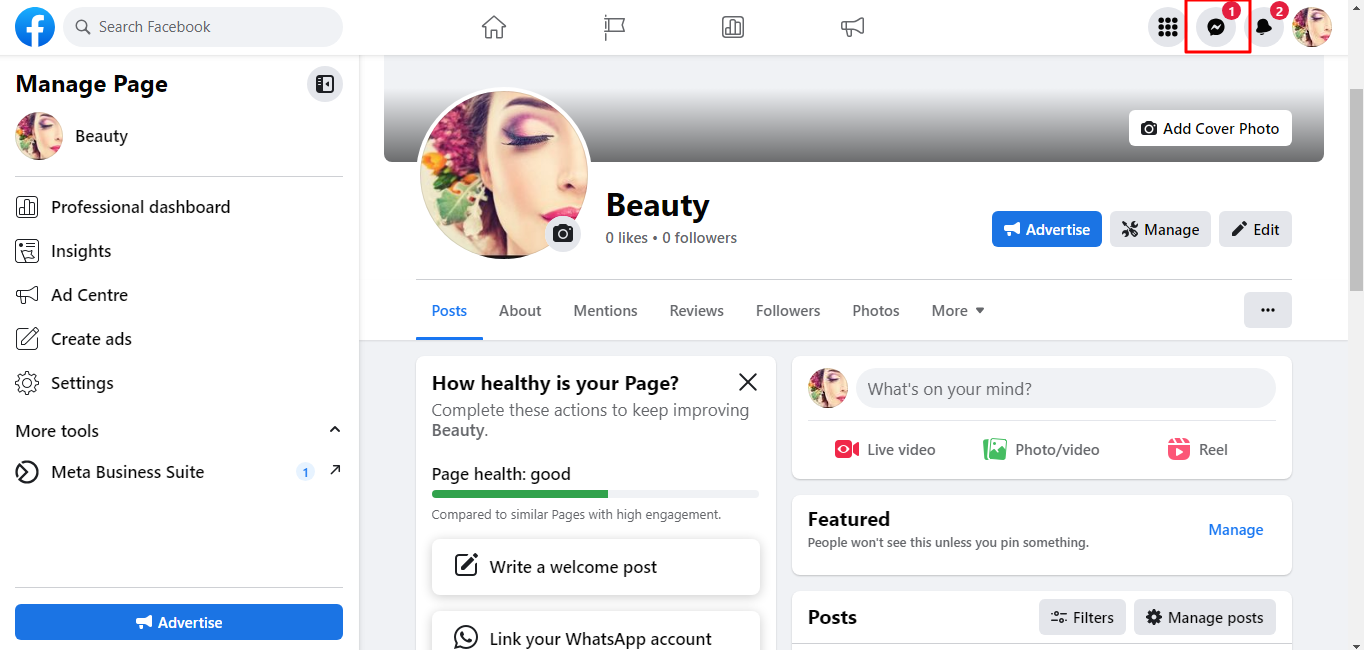
Configuring Facebook Messenger from vendor end #
The vendor needs to go to his Facebook page and click on Messenger/chat icon.
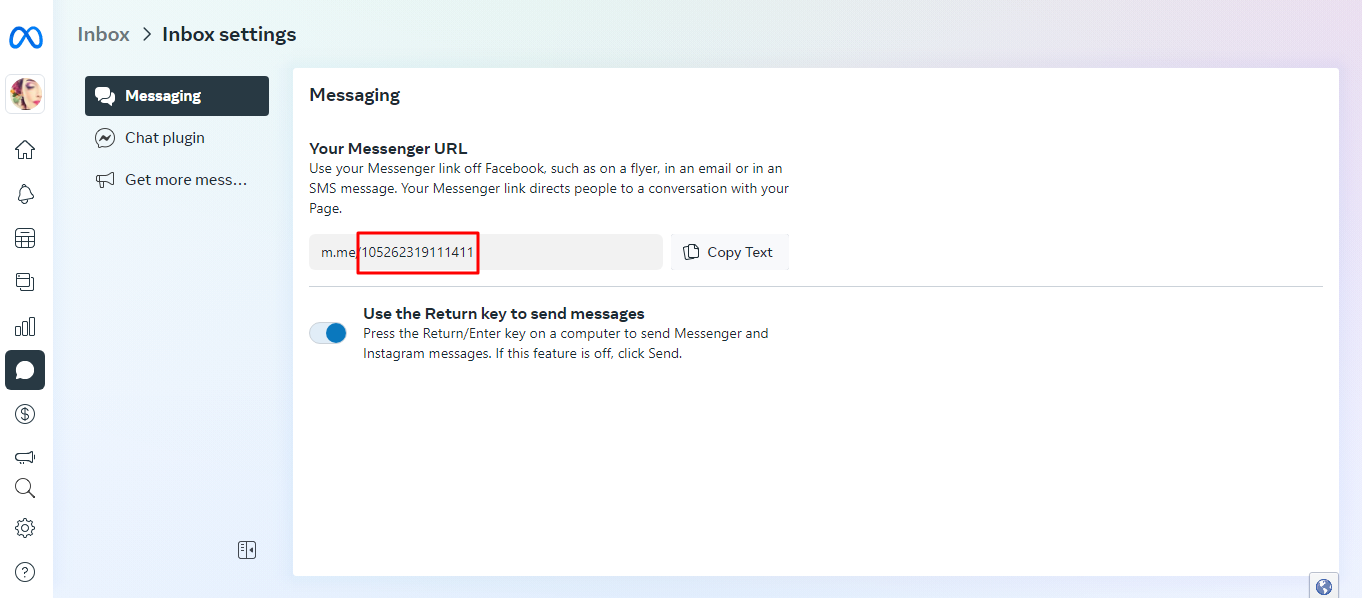
After getting redirected to the inbox page he needs to click on settings and then from there click on view all settings.
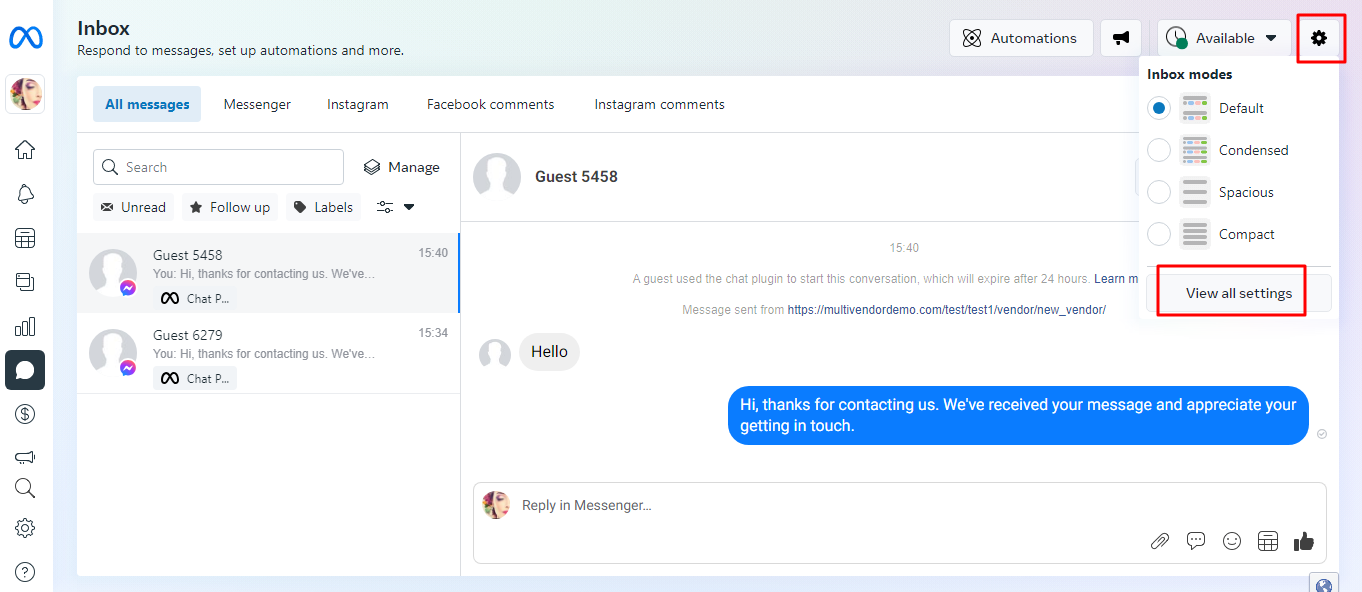
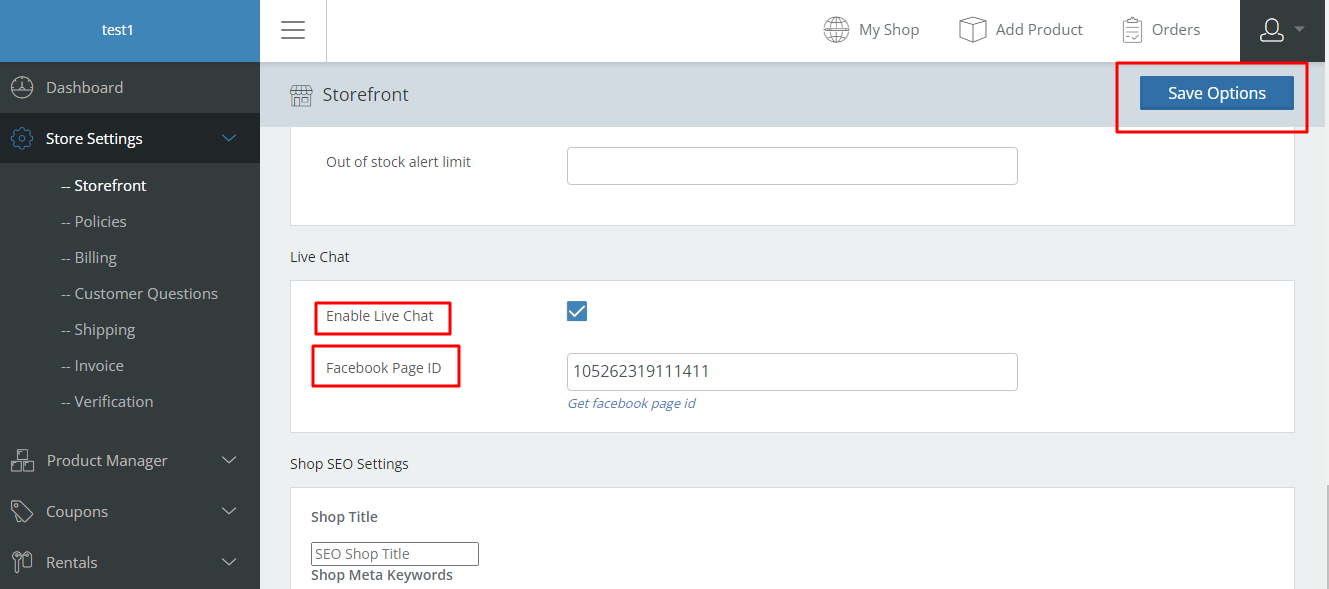
Once redirected , copy the page id and paste it in the vendor dashboard Facebook page id option under Live chat of Store settings and then simply click on Save options also don’t forget to tick the enable live chat option.
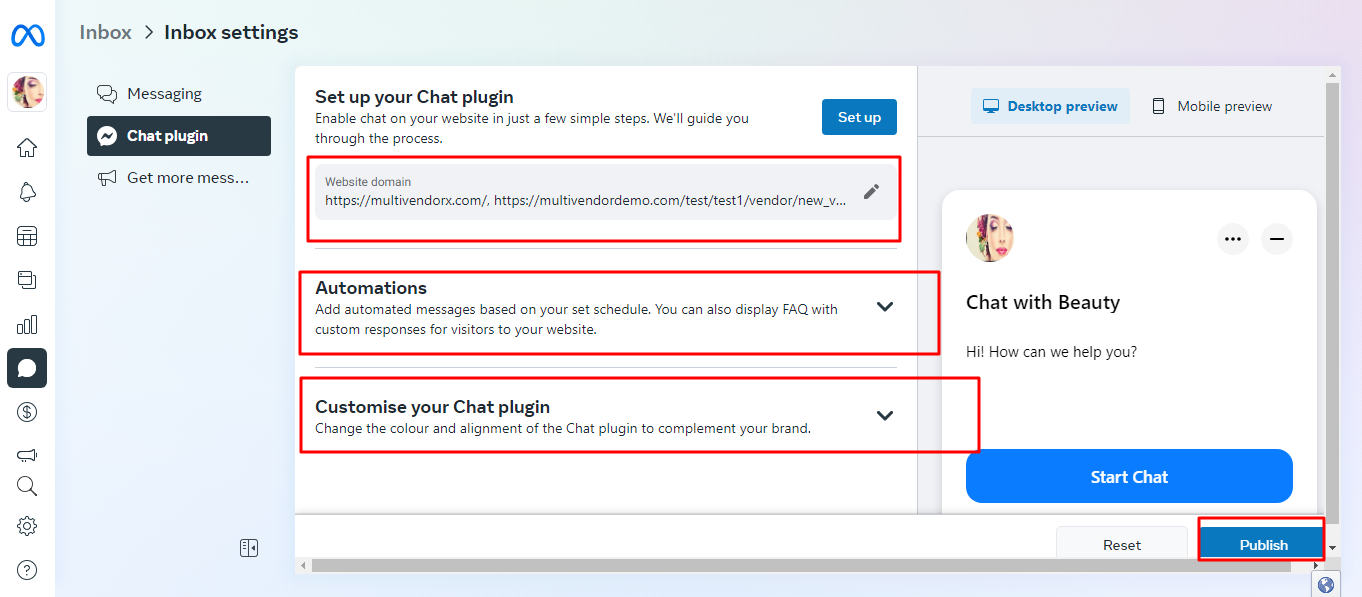
Now get back to the inbox page of Facebook and click on Chat plugins and there add the vendor’s store page URL in the web domain section and click on publish after adding the customization and automation of your choice.
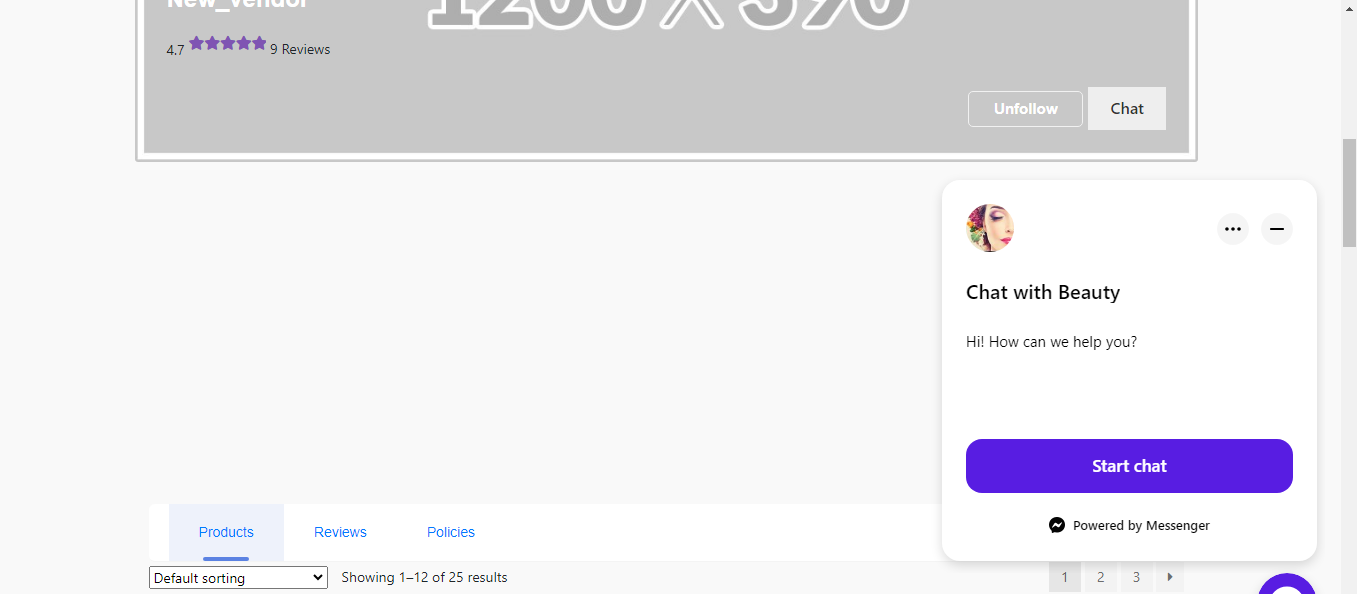
The chat option is now added to the vendor store and customers can chat with the vendor by clicking on the chat option present on the vendor’s store page.


Leave a Reply
You must be logged in to post a comment.