Brief Description #
Turn your e-commerce website into a product catalog to get a personalized digital salesperson. You can use the product catalog plugin to access a variety of features. This includes the ability to operate both catalog and sale modes, a mini inquiry cart, an extremely flexible inquiry form, and others. Let’s take a look at how you can use this fantastic product catalog enquiry plugin.
Requirements #
Configuration from admin dashboard #
After activating the Product Catalog Enquiry plugin from the plugin page follow the below steps for configuration –
- Go to admin dashboard and navigate down to Catalog.
- Now simply click on Settings submenu and start with the configuration of the different settings.
General Settings #
By configuring the below settings of Product catalog enquiry the admin can turn his WooCommerce website into a product catalog very easily.
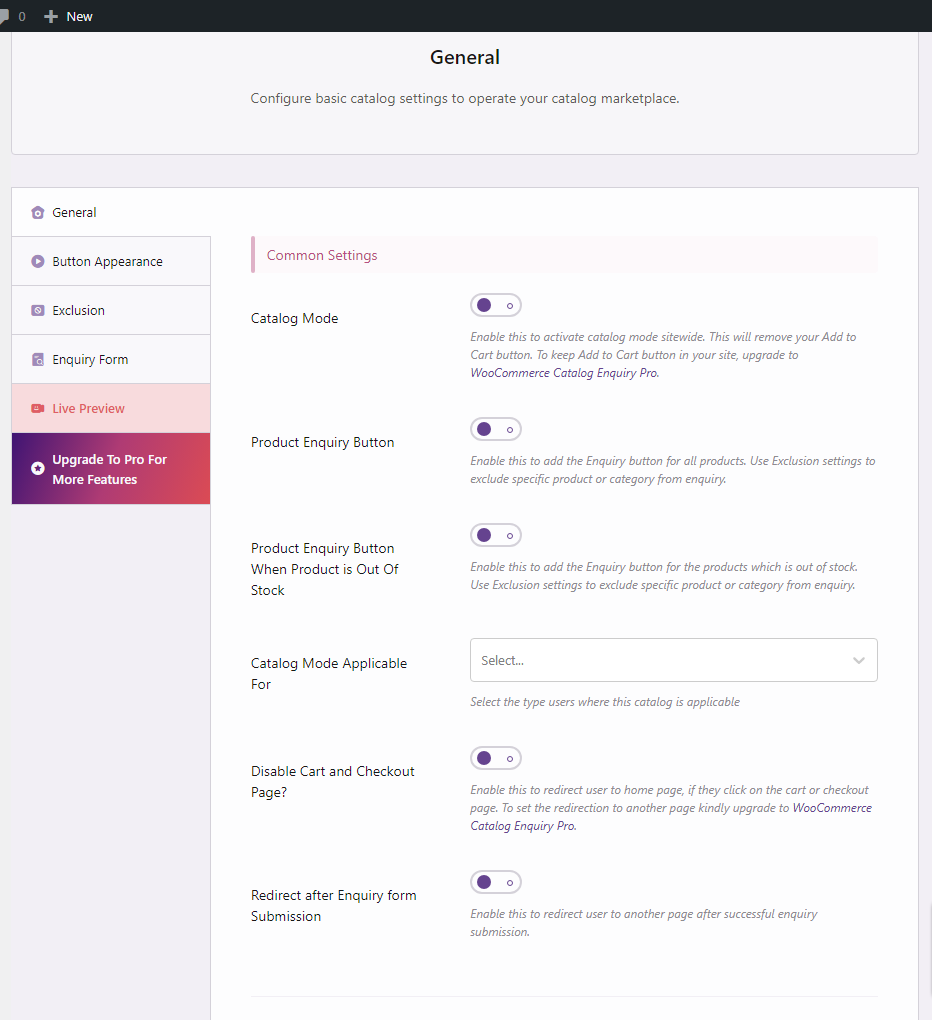
Common Settings #
- Catalog Mode– Enable this to activate catalog mode sitewide.
- Product Enquiry Button-Enable this to add an enquiry button for all products.
- Product Enquiry Button when Product is out of stock– Enable this option only if you want enquiry for out of stock products.
- Catalogue Mode Applicable For– Select the user type from the dropdown menu where this catalogue will be applicable.
- Disable cart and checkout page-Enable this to hide cart and checkout page and set new page to redirect the user.
- Redirect after Enquiry Form Submission-Enable this to redirect user to another page after successful enquiry submission such as home page etc.
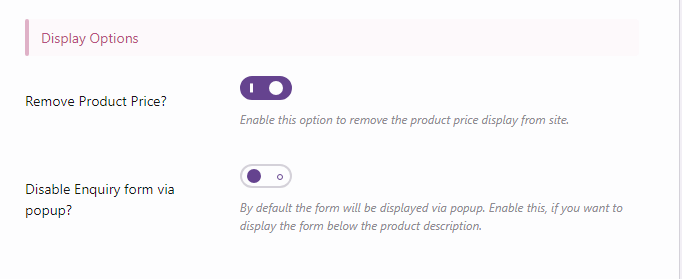
Display Options #
- Remove Product Price– Enable this to hide product price from site and disable purchase.
- Disable enquiry form via popup– By default, the inquiry form will be displayed via pop-up. Enable this if you want to display the button under the product description.
Enquiry Email Receivers Settings #
- Additional Receivers Email-Enter the email address where you want to receive inquiry mail. Therefore if you also want to send email to abx@xyz.com, then simply pass this email id there.
- Remove admin email-Enable this if you to remove the admin email from the receiver’s list.
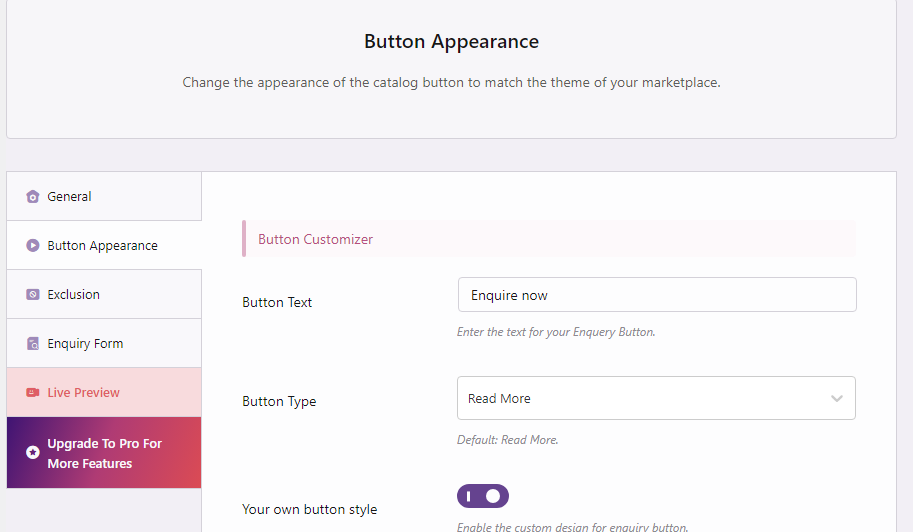
Button Appearance #
From here the admin can configure different settings related to the enquiry button and customize it accordingly.
Button Customiser #
- Button Text-In this field enter the text for your enquiry button.
- Button Type– Select the appropriate option from the dropdown list to choose the enquiry button type from the following options :
- Read More
- Custom Link for all products
- Individual link for for products
- No link just #
- Your own button style-Enable the custom design for enquiry button.
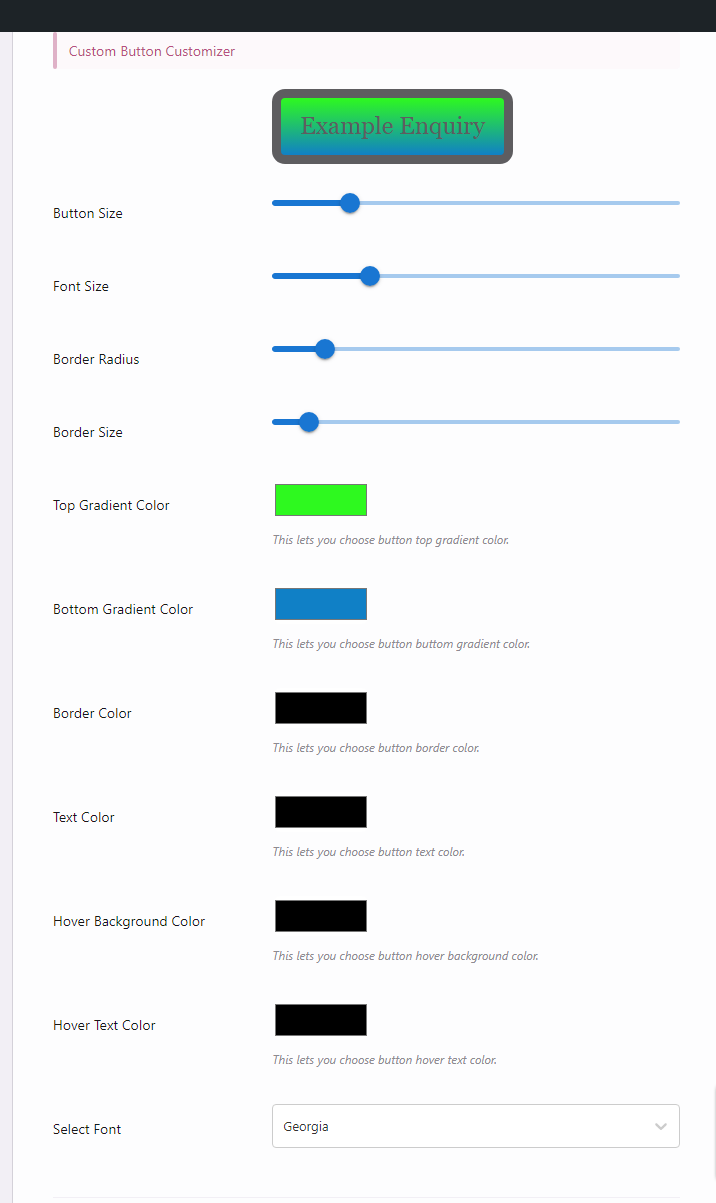
Custom button customizer #
Once the ‘your own button style’ option is enabled you will get the option to customize the button by choosing the options like – Button size, font size, Border radius, Border size, Top gradient color, Bottom gradient color, Border color, Text color, Hover background color, Hover text color, Select font.
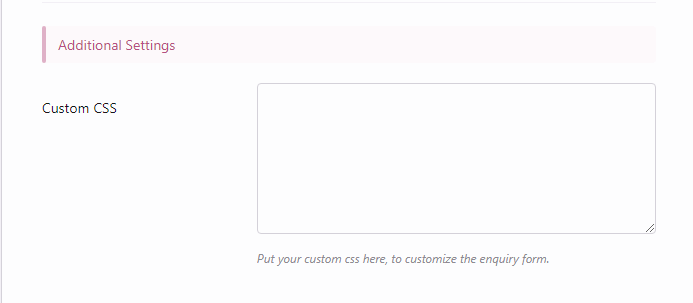
Additional Settings #
Custom CSS– In this field write your custom css to customise the enquiry form.
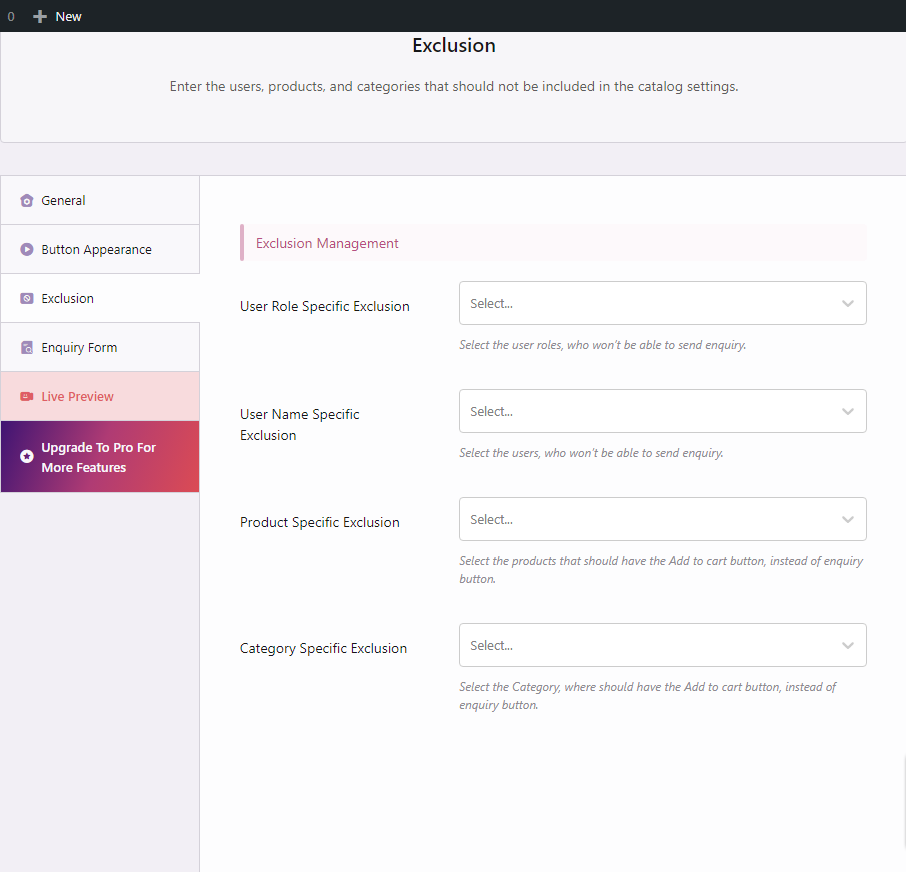
Exclusion #
The admin can set different attributes(such as user role, name, category etc.) for which the catalog mode will not be applicable.
Exclusion Management #
- User role specific Exclusion-Select the user roles, who won’t be able to send the enquiry.
- User name Specification Exclusion– Select the user, who won’t be able to send enquiry.
- Product Specific Exclusion– Select the products that should have the Add to Cart to button, instead of enquiry button.
- Category Specific Exclusion-Select the category, where should have Add to Cart Button, instead of enquiry button.
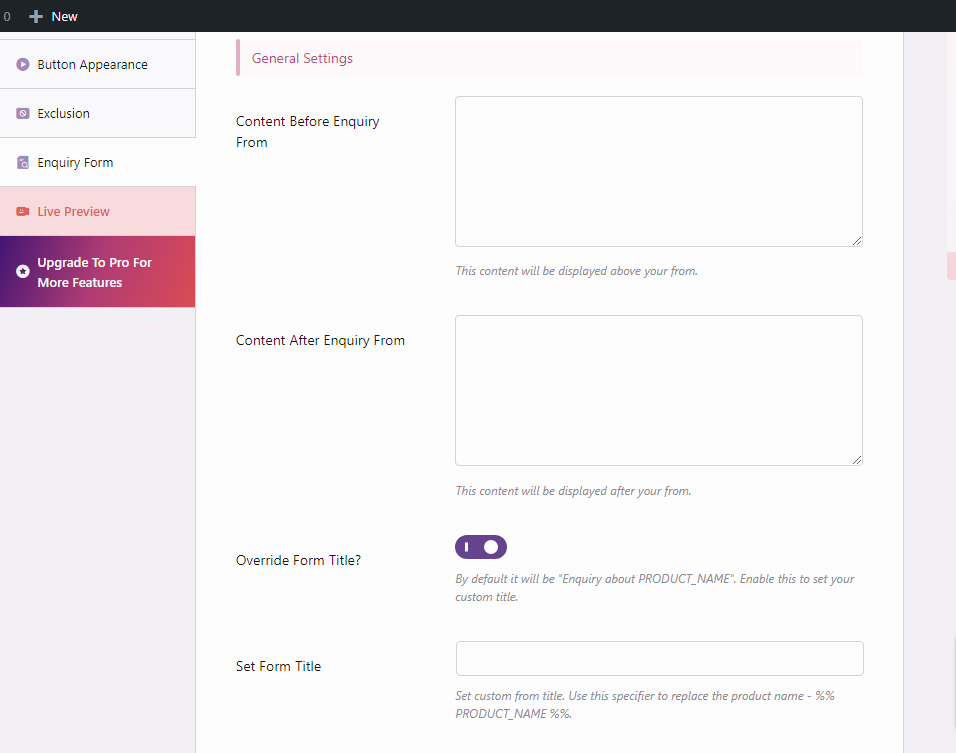
Enquiry Form #
The admin can customize the enquiry form as per their requirement by customizing the form content and form fields from here.
General Settings #
- Content Before Enquiry Form-Fill this field to write description before about enquiry form.
- Content after Enquiry Form-This content will be shown after enquiry form.
- Override Form Title– Enable this to set your custom title.
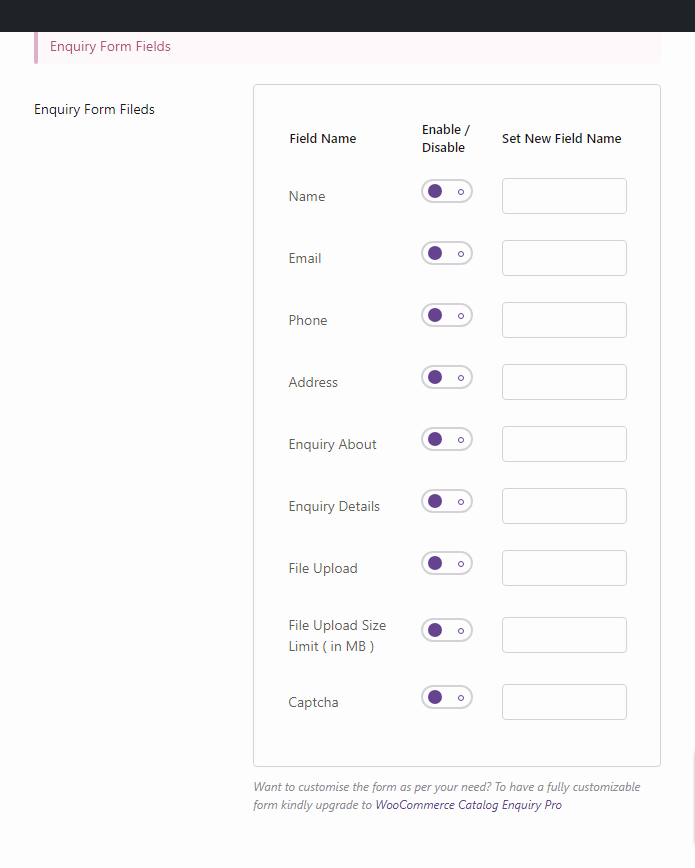
Enquiry Form Fields #
- Enquiry form fields– Enable the fields from the given options as needed. This will be reflected in the enquiry form.


Leave a Reply
You must be logged in to post a comment.