
")


Brief Introduction #
Showing the area of a store is accompanied by various advantages. Assuming a store is accessible, clients who are close to or around the store can visit it. Furthermore, store location can aid in calculating shipping costs based on distance. Make it easy for customers to find vendor stores by displaying their locations. With MultiVendorX, vendors have the option to add the location of their store on a map.
Store Location Configuration #
Let vendors add the location of their store from the dashboard by enabling the store location module.
Enable Store Location #
You can configure Store review settings in the following manner:
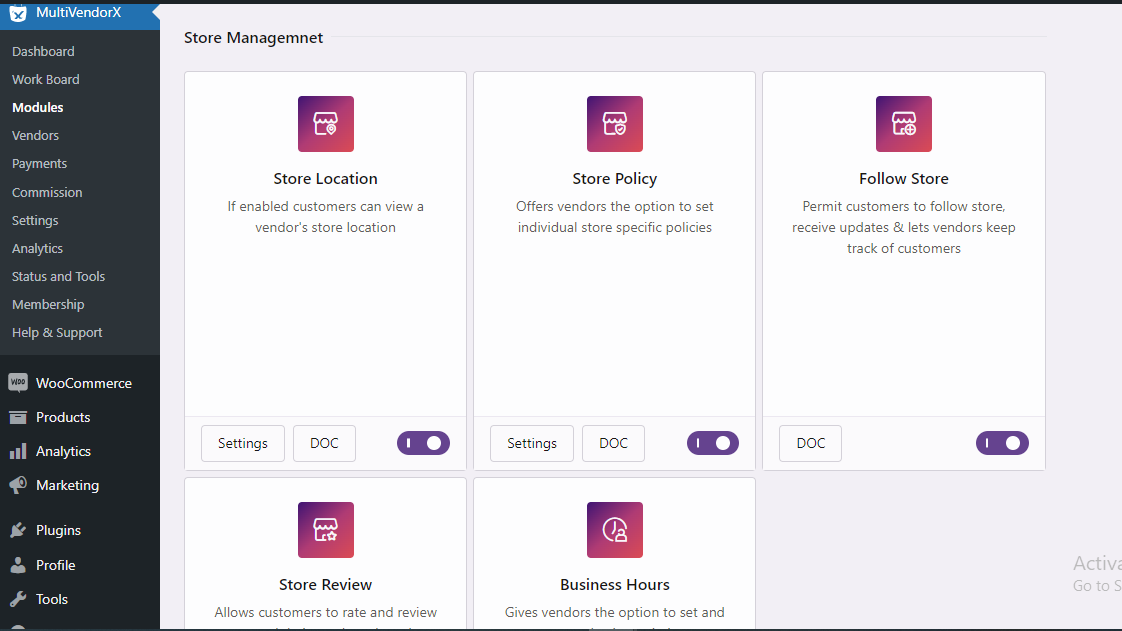
- Go to Admin Dashboard and then select the MultivendorX menu option. Once selected, pick the Modules option from the menu list displayed below.
- On the Modules page, go to Store Management.
- Under the Store Management section, enable the Store Location option and then navigate to the Settings button to make further changes.
Store Location Settings #
Once you’ve enabled the store location and selected the setting option you will be transported to the Store location page. The settings you need to configure there are:
- Store Location – As you have enabled the module this option will be automatically enabled.
- Location Provider – You can choose two kinds of map providers from this option. One being Mapbox and the other being Google maps.
- Mapbox Access token – Add the access token that will allow you to use Mapbox to display vendor location. To receive your access code follow this document.
- Google Access token – Add the access token that will allow you to use Mapbox to display vendor locations. Follow this document to get your keys.
- With this your share of the location setting is complete.
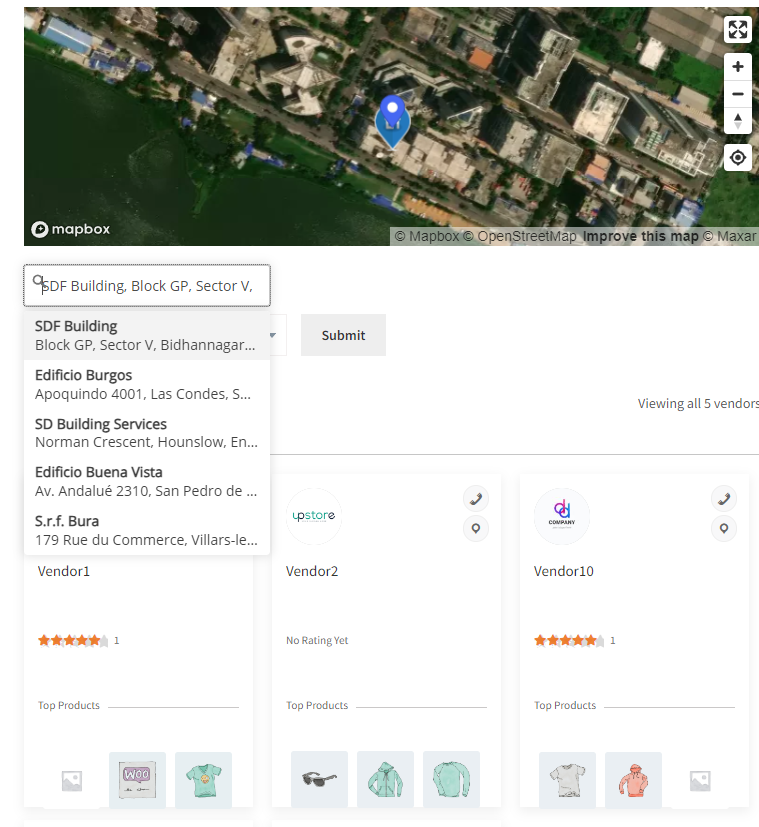
Add Store Location #
Vendors can add the location of their store that would enable customers to find it. To the location of their store vendors must –
- Go to the Vendor dashboard and navigate to Store Settings
- They must then select the Storefront option
- Once the Storefront page loads, they must scroll down to the store location and add their location

Vendor list page #
On the vendor list page all the vendor store pages are displayed. For that you need to add the below shortcode in your vendor list page.
[mvx_vendorslist orderby=”registered” order=”ASC”]
This shortcode will create a page with all vendor lists, where you can sort the vendor by this filters :
- Location
- Category
- Product
- Shipping Address
With this, we come to the end of the tutorial. Hope you had no difficulties understanding the configuration process. But in case you stumble across one be free to contact our support team.


