
Brief Introduction #
If you are thinking of offering services or products that need to be pre-booked, the Bookable Product type is your go-to option. With MultiVendorX Pro, adding and managing a bookable product can be done easily in very easy steps. This document shows you how to create a bookable product and how to manage them.
Requirements #
- WooCommerce Version 1.15.36
- MultiVendorX
- WordPress 5.6.2
- MultiVendorX Pro
- WooCommerce Bookings
Bookable Product Configuration #
Admin Configuration #
You can now turn your basic marketplace into a bookable marketplace by letting vendors upload and manage bookable products. Given below is how you as an Admin can set up a bookable product option for the vendors.
To let a vendor upload a bookable product an Admin must –
- Go to the WordPress dashboard and navigate to the MultiVendorX option. From the List of options, the admin must then select the Module option.
- Once the Module page loads the admin can then go under Marketplace Type option.
- From there, the admin must select the Bookable Product option.
Note: Make sure that the WooCommerce Booking plugin is installed and activated. This is because MultiVendorX provides you with the benefit of availing of this WooCommerce feature to multiple vendors. Hence letting you create a multi-vendor booking marketplace, where various vendors can provide the same benefit.

Vendor Settings #
Now that you have enabled vendors to upload booking products, we will be going through the settings on the vendor’s end.
Create A Bookable Product #
To make it easier for you to understand, we will be dividing the product creation process into five parts. The first part consisting of the basic or general bookable product settings, the second part showcasing how to set price, the third part will be about helping you with setting-up the availability tab, the fourth talking about the has person section and the final part about the has resources section.
To create a bookable product a vendor must –
- Go to the Vendor Dashboard and select the Product Manager menu option. Following this, he/she can then select the Add Products sub-menu option found under Product Manager or select the Add Product link available on the topside dashboard menu.
- On the Add New page, vendors can click on the Create a New Product link present under the search field. Once selected they can choose the category under which they want the new product.
- As soon as the New Product Page loads, the vendor must fill-in required details like the product name, product description, product gallery, etc, by following the simple product document.
- Now let us jump to the main part of this article – the Product Type section. Here the vendor will have to select the product type as Bookable Product. Once selected the there will be a change in the general settings section. Here the vendor will have to configure the duration and time of the booking. Given below are the details of the general settings –
- Booking Duration – This section lets the vendors set the period till which they want the booking to last. Booking duration can be set as per –
- Fixed blocks – Fixed blocks enable vendors to decide the duration till which they want the product to be available. This way customers can book the product only when it is available. For example, A vendor only sets an appointment for Wednesday. If she/he is booked for the first week of Wednesday. The customer has to wait for next Wednesday before they can set an appointment.
- Customer-defined blocks – With this option vendors can let customers decide when they want to book a product. Unlike the previous option customers can book them according to their convenience For example, the co-working space is rented out in hourly intervals, and the customer can define how many 1-hour blocks they would like to rent.
- Minimum duration – This refers to the least amount of time till which the customer can book a product.
- Maximum duration – Opposite of minimum duration, here vendors can set the utmost amount of time till which the customer can book a product
- Enable Calendar Range Picker – This option is only available if the booking duration is customer-defined. Here customer can select a start date and an end date for their booking within the calendar which we will discuss in the next point.
- Calendar display mode – This option lets vendors decide whether they want to let customers view the calendar or not. Two option available under these settings are –
- Display Calendar on Click – If this option is selected, customers can only view the calendar when they are about to book.
- Calendar Always Visible – By default this option is automatically enabled. This allows the customers to view the calendar while perusing the product.
- Requires Confirmation – Enabling this option will mean that the customer booking has to be manually booked by the vendor after he/she confirms it with the customer. The customer on the other hand will only be able to view the check availability option until the vendors confirm the booking.
- Can be Cancelled – When the vendor enables this option, it means that he/she has allowed customers to cancel their bookings. Once enabled the vendor can decide on the date till which cancellation can be allowed.
- Booking Duration – This section lets the vendors set the period till which they want the booking to last. Booking duration can be set as per –
Reference 2 – General Settings
Cost Tab #
Setting a price for the bookable product would be a bit different from setting a price for a simple product. Here you can add two separate pricing details. These details include –
- Base Price – A very simple description of base price would be that it is the principal amount of a product. In other words, it is the basic amount a customer would have to pay if he/she wishes to avail of the product or service. Vendors can create a variation of
- Block Price – A block price can be charged for every block, segment, time a customer wishes to purchase. A rudimentary example of block price can be – if a customer wishes to book an hour for a spa service the block price for that hour can be $10. if the customer wishes to book the service for two hours the block price is will be $10 for 1 hour + $10 for another hour which equals $20 for two hours.
- Display Cost – This is the amount that would be visible to a customer.
Set A Price Range #
MultiVendorX offers vendors an added option to set a variety of prices based on time, date, person or block. To know how to create a range of prices the vendor can –
- Select the add range option, visible under the range type block.
- Then the vendor needs to select the –
- Range Type – The range type refers to the date range of the product. This means here the vendor can decide whether he/she wants the product to be available for a month, week or even a specific day. In reference 3 you will be able to see the options available under range type.
- Range – Under the range column the vendor can manage the dates of his bookings. Here the vendor can add the To and the From date of availing the product.
- Arithmetic Symbols – Before adding a range base price vendors will notice a field showcasing the plus, minus, multiplication and division symbol. Selecting the symbols will allow the range base or block prices to be added, subtracted, multiplied or divided from the original base or block price added by the vendor.
- Base Price – Base prices added in the range will either be added, subtracted, multiplied, divided or equalled to or from the original base price added by you. Given below are 2 examples that will help you understand the process.
Example – If the original base price is ₤100 and the vendor selects the add sign and then adds an amount of ₤5 the total amount the customer has to pay would be ₤105

Reference 3 – Add a Range Base Price
- Block Price – As explained above, the range block price can be added, subtracted, multiplied or divided from the original block price.
Reference 4 – Add a product price
| Note – A variation of base and block prices can be added by adjusting the date range. In case a vendor adds two different block prices to the same date range, adjustments can be made by configuring the priority section of the Availability Tab |
Availability Tab #
Managing the availability tab of the product data meta box will help the vendor display to customers the availability of their service or product. To set-up, the availability of a product the vendor has to set up the –
- Maximum Bookings Per Block- Maximum Bookings per block gives vendors the chance to do multiple bookings at the same time. For example, if the vendor is hosting an online show, multiple customers would be able to book it at the same time if this option is enabled.
- Maximum or Minimum Blocks Bookable – This refers to the highest or the lowest limit of the block a customer can book before the availability of service. For example, if today is 1st April and the minimum block bookable is set to a month in the future, then the first date on which a customer can book would be 1st May.
- Buffer Period Required between Bookings – Based on the time set for the booking (minutes/hours/days), a period that is not available for others, can be specified. For example, if the vendor wishes to sell appointments in 2-hour blocks and wants to have an hour break in between, you can specify a buffer period of your choice.

- Adjacent Buffering – If you wish to add a buffer period both before and after your appointments, select the Adjacent Booking Checkbox.
- All dates Availability – This option helps you to set based on –
- available by default – If the vendor selects available by default, it means all blocks are available and you can set rules and turn off certain blocks
- not available by default – Alternatively, if the vendor selects not available by default, it’ll mean that blocks aren’t available and must be turned on through availability rules.

- Availability Rules – Vendors can further customise their availability option by selecting their availability rules. These rules let the vendor make their block either available or unavailable to customers. The two options present under this section are –
- All blocks being blocked– This feature checks the blocks that are available for a particular duration. For example, if a customer books for 6 days and 1 block is equal to 1 day, then this feature will check the availability for all the 6 days.
- The starting block-This feature will enable you to check the first block that the user selects. For example, if the customer chooses to book for 4 days and 1 block is equal to 1 day, this feature will check the availability for the first day only.
- First block starts at – For users who wish to restrict booking hours, can set a time with this feature.
- Restrict Selectable Days – This option is to be selected if the vendor wishes to not accept booking on certain days. When the vendor select days on which he/she shall not accept booking customers will not be able to click those dates on the calendar while booking the product.
- Add Range– As mentioned in the previous section, adding a range will provide more options to the vendor and the customer. Section available under this section are –
- Range Type – the range-type setting for availability would be the same as the one for the Costs tab.
- Range – The range lets the vendor select the onset and end time of the bookable product
- Bookable – The bookable option lets vendor decide whether he/she wishes to accept the booking at a given time range or not.
- Priority – By adding a priority, the vendor can decide when a certain booking option can precede the other. For example, the vendor can add rules like on May Thursdays the booking period is from 10 AM to 10 PM but there can also be an option where on June Thursdays the bookable timing is from 1 PM to 3 PM. So, if the priority level of May Thursdays is set as priority 1, it will take precedence over the June Thursday format which would be set at priority level 2. Alternatively, when the month of June arrives the vendor can reverse the priority levels.
| Note: Rules with lower priority numbers will override rules with a higher priority. For example, 9 overrides 10. Ordering is only applied within the same priority and higher-order overrides lower order. |
Resources Tab #
Managing resources lets the vendors offer to his/her customer the option of extra amenities exclusive of the bookable product. These can include room type options like Dulex, Suit etc, usage of pool or gym services, Salon services etc.
Vendors can add resources for a bookable product simply by ticking on the has resources option available in the product data meta-box. To add a resource, the vendor has to add the following information –
- Label – In the label field vendors’ can name the resource they wish to add
- Resources are – This section lets the vendor decide how he wishes to assign the resources. Resources can be assigned based on –
- Customer Selected – If this option is selected, customers can decide whether they wish to opt for the resource or not.
- Automatically Assigned – Some services can be automatically assigned to customers depending on certain criteria. For example, if there is a room booking for four people, the customer would automatically be assigned a deluxe room instead of a regular room.
- Add/ link Resource – This option will let the vendors add or create bookable product resource. Along with this vendors can also add the individual price of these resources. In the manage booking section of this article, we will see how vendors can manage these resources.
Person Tab #
As many of us know some bookings conventions like accommodation or movies bookings put out restrictions in terms of people allowed to make a booking. This can due to lack of space, lack of resources or many such factors. But no matter the cause WCMp offers vendors the option to set up bookings per persons. To figure out how vendors can make these changes continue reading on.
To decide on the number of people accepted for a certain block of booking the vendor can start by selecting the has person options. Once selected the vendor can add in the following details present under this section. These details include –
- Minimum or Maximum persons per booking – Depending on space or resources vendor can decide on the number of persons they can accept per booking. One example of such booking can be that in a movie hall only a certain number of seats are available and based on these seats only that amount of people can be accepted. So keeping those numbers in mind vendors can decide on the minimum or a maximum number of people allowed to make a reservation.
- Multiply Cost By Persons Count – An interesting option that lets vendors charges booking fees based on people making a reservation as opposed to charging based on a block. This means instead of charging for say an hour the vendor can simply charge on how many people want to reserve the service for the hour.
- Count Persons as Bookings – As we have discussed before in this tutorial availability section, there is a maximum booking per block option available. If the vendors select the count persons as booking option, then each person would be counted as a booking until the maximum number added in the maximum booking per block section is reached.
- Enable Person Types – This option lets the vendor set a variation of prices based on the person’s age, gender or even number. To add a person type option the vendor can add- in the following details.
- Person Type Name – In this field the vendor can type in the name of the person. For example Child, Adult, Women etc
- Base Price – This refers to the basic or the minimal cost of the booking.
- Block Price – Block price is charged on the basis of every individual block. To get a better understanding refer to the Cost Tab section of this article.
- Description – Vendors can specify the basic requirements of the person type in this field. As shown in the reference … the description of a child is under 10 years of age
- Minimum and maximum – These fields let the vendor add both the least and the most number of people they wish for the product. For example, on women’s day, the vendor wishes to put on a sale so he/she can set up the maximum number of women (women being the person type) availing the product to be 20 vs men availing the product to be only 10.
Once all the details are added the vendor can either publish the product or submit it for your approval.
Manual Bookings #
Vendors can create bookings from their dashboards in place of the customer. These bookings are usually made when the vendor wishes for the customer to confirm a Booking.
To book a product from the vendor side, the vendor must
- Go to the vendor dashboard and select the Bookings menu
- Once the Bookings menu list drops, the vendor can then select the Add Booking option.
- As soon as the Add bookings page opens, the vendor can add the customer’s name in the customer field
- Next, the vendor can select the bookable item which he/she wishes to reserve
- Then the vendor can create an order. Vendors can either create a new order for the product or link it with the order created by the customer.
- An alternate Do not create order option is available. This option is selected by default, as most bootable products are generally booked by the customer.
Vendor Bookings Manager #
Now that we have seen how vendors can add bookable products to a product list, isn’t it obvious to learn how to manage these? Well with the easy to follow instructions vendor would learn how to manage multiple bookings in no time.
Booking Log #
The booking log keeps track of all the vendor’s bookings for him/her. In addition to this, vendors can filter and view his/her bookings following the payment status or the bookable product name. The information displayed under this log is –
- ID – The identification number present under the Id column can be used by the vendor to keep track of individual booking.
- Booked Product – The booked product section reflects the name of the bookable item
- Of Persons – In the case a product is booked based on people, the vendor can view the number of people making the booking here.
- Booked By – This section of the booking log displays the name of the person making the booking
- Order – The order section showcases to the vendor the order number of the booking. This way it gets easier for the vendor to keep account of all his/her order.
- Start and End Date – These two columns show the vendor the beginning and ending dates of the booking period.
- Action – The action column will redirect the vendor to the page exhibiting the booking information.
Booking Details #
The booking details page opens if the vendor selects view under the action column of the booking log. Here the vendor would be able to view basic information about the booking along with the customer details. Apart from viewing vital information vendor can also manually change the booking payment status by selecting either the unpaid, confirmed, pending confirmation, paid, canceled or complete options.
Resource Management #
The resource management option lets the vendor view and track the resources created by him/her. Here the vendor can view both the name and the date on which the resource was booked.
Booking Planner/ Calendar #
Just like a planner, vendors can view their bookings on a calendar format. The booking planner also makes it easier for the vendor to see if he/she is booked on an hourly, daily, weekly or monthly basis.
With this we come to the end of the tutorial.Hope vendors find it easy to create multiple Booking products
*For more informaton, refer to this documentation : https://docs.woocommerce.com/document/creating-a-bookable-product/

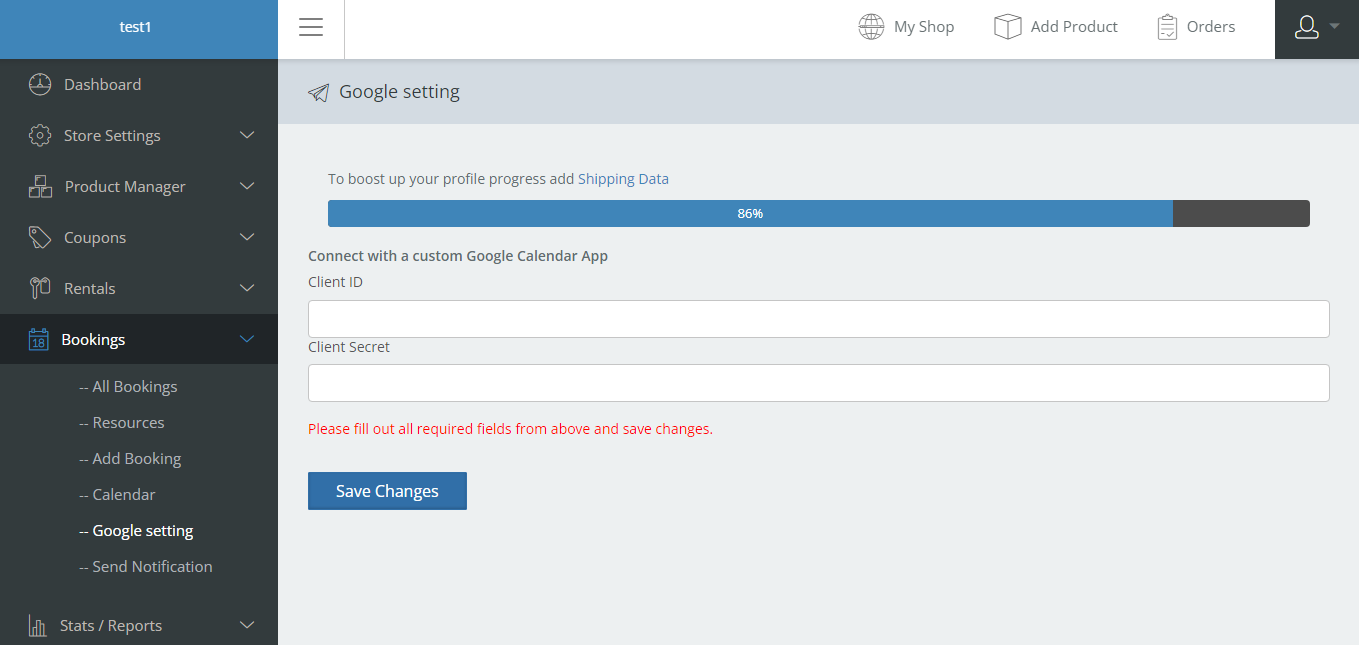
Google Setting
The vendor needs to add the Client Id and Client Secret key to connect their store to their Google calendar app.
Send Notification


Leave a Reply
You must be logged in to post a comment.