An invoice is a document you give to your customer on the sale of goods or services. This document keeps a record of the transaction that takes place between you and the customers, as evidence of the transaction. The MultiVendorX invoice module sends an automated invoice to both your vendors and customers. Vendors and customers both have the option to browse or download the invoice. Along with this, vendors can also download packaging slips for procurement purposes and craft separate invoices with the vendor’s exclusive brand and logo.
Invoices are essential as they are required for bookkeeping and procurement purposes. You can design your personalized invoice slip by managing the invoice configurations.
You can create a customized Invoice slip by configuring the following settings –
PDF Output – The PDF output refers to, how or where the customers or vendors can view the invoice. The options available are –
Download the PDF – If this option is selected, vendors and customers will have to download the invoice slip before can view it.
Open PDF in a Browser – If you select this option, both the vendor and your customers will be able to view the Invoice in their browser without downloading it.
PDF Size – In this field, you can select the size of the invoice. The options provided to you would be either, an A4 size or a letter size
PDF orientation – PDF orientation refers to the page layout. You can either select a Portrait (Vertical) or a Landscape (Horizontal) layout for your invoice.
Attach to Email – In this field, you will have to select when and under what order status you want the customer to receive the invoice.
New Order – Selecting the New Order option implies customers would receive an invoice slip as soon as they place an order
Canceled Order – If the Canceled order option is selected then the customer would receive an invoice only after his/her order gets canceled
Customer Processing Order – When you select the processing order option the customer will receive the invoice as soon as the vendor starts processing the customer’s order
Customer Completed Order – This option allows the customer to receive an invoice as soon as the vendor delivers the order.
Customer Refunded Order – If this option is selected, the customer would receive an invoice after receiving a refund.
Select default invoice template – By selecting a PDF template you can decide on the appearance of the Invoice. MultiVendorX Pro offers you five template options which you can look at by clicking on the link given below.
Invoice Field – The invoice field allows you to add certain information on your invoice slip other than the usual. From the option available simply select the boxes you feel are necessary for your invoice slip.
Vendor disclaimer – Ticking this box would enable the vendor to add any information related to the product or store, i.e ‘delicate product, handle with care or “Store closed till 1X/XX/XX’ etc.
Vendor GST – In case the vendor had added additional GST charges to the product you can select this option you let the customer view it.
Vendor Tax – To let the customer know about any tax charges added to the product by the vendor, select this option
Vendor signature – Selecting this option ensures your slip contains the vendor’s signature.
Vendor policies – Enable this option if you want vendor-specific policies displayed on your invoice slip.
Invoice number – An invoice number,is a unique set of numbers used to track payments. By enabling this option your invoice slip will contain an invoice number.
Invoice number format – An invoice number format is usually arranged as – The first series of numbers contains the date, the second series of numbers contains the customer number, and the third series of numbers contains the sequential unique identifier for the invoice. . You can choose to add the current year or month as a prefix by simply copying or writing ‘YEAR’ or ‘MONTH’ from the description provided below.
Company Logo– You can add your company’s or personal logo to the invoice to make it more memorable. This however can be changed if the vendor chooses to add his or her personalised logo.
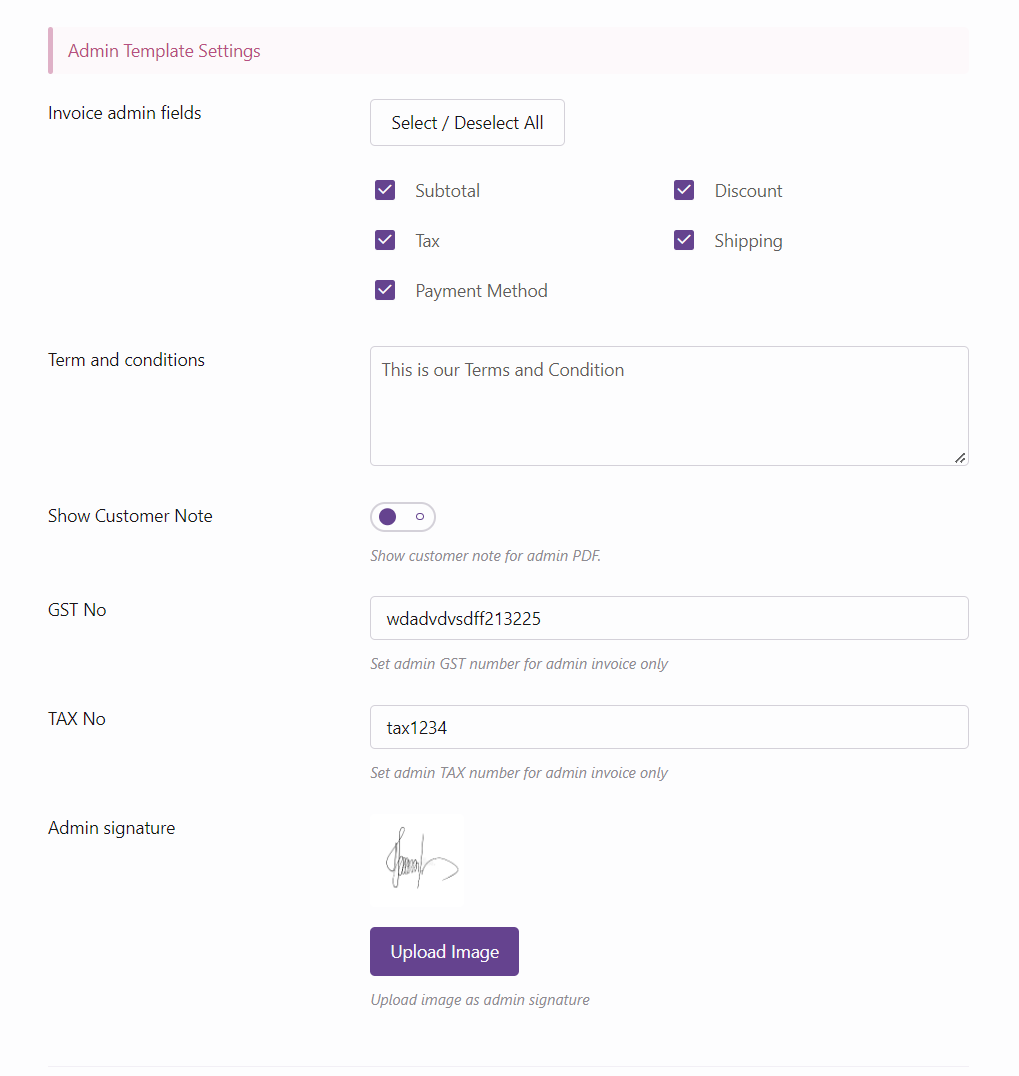
By configuring the admin template you can decide what information you want on your side of the invoice slip, other than the ones mentioned in the general settings.
The information settings for admin invoices are
Subtotal – Enabling this option will display the total amount of purchase on your invoice slip.
Discount – You can enable this option to view the discounted amount or percentage.
Tax – You can view the tax amount added to your invoice by selecting this option
Tax No : Admin can set tax number to display in the invoice.
GST No : Admin can set his GST Number, that will be displayed in his order invoice.
Shipping – Enabling this amount will let you view the shipping amount.
Payment Method – By enabling this option you view the payment method used to pay the order.
Terms and Conditions – In the terms and conditions section, you can add your company policy or any terms and condition you deem as necessary.
Show Customer Note – If this option is enabled, then it will display the note included by the customer at the time of purchase
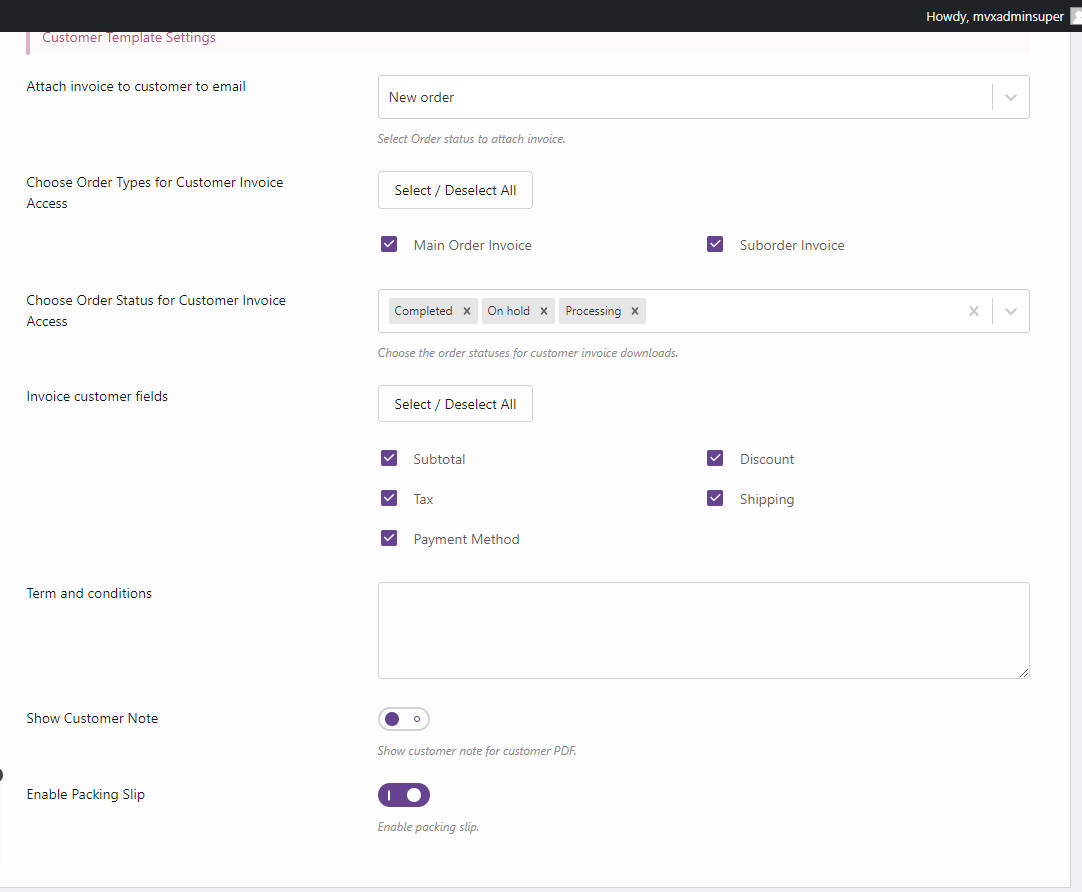
Invoice slips that are handed out to customers have a few additional settings that are different from an admin’s. However, the invoice itself is no different. You can set a few conditions for customers to receive their invoice slips.
Attach Invoice to Email – Configuring this setting would enable MultiVendorX to send an invoice slip to the customer mail when the order is in the following stage –
Disabled – If the disabled option is selected, no invoice slip would be mailed to the customer’s mail.
New Order – Selecting the New Order option implies customers would receive an invoice slip as soon as they place an order
Cancelled Order – If the Canceled order option is selected then the customer would receive an invoice only after his/her order gets cancelled
Customer Processing Order – When you select the processing order option the customer will receive the invoice as soon as the vendor starts processing the customer’s order
Customer Completed Order – This option allows the customer to receive an invoice as soon as the vendor delivers the order.
Customer Refunded Order – If this option is selected, the customer would receive an invoice after receiving a refund.
Choose Order Types for Customer Invoice Access – Here the admin can select order type (main order/suborder) for which the customer will have invoice in their My account page.
Choose Order Status for Customer Invoice Access – Admin can choose multiple order status for customers to access invoice from their My account page.
Invoice Customer Field – As mentioned, the invoice slip has the same custom field option as the admin custom fields. You can simply select or deselect the options depending on your requirement.
Show Customer Note – Enabling this option will lead to show the customer note in the customer pdf.
Enable Packing Slip – Once this is enabled the packing slip will be visible to the vendor.
A packaging slip is a document that includes the complete list of items included in the package. With the help of MultiVendorX, you can let vendors download a packaging skip for their products. To let vendors download the Packaging slip, simply enable the Enable Packing Slip option
With the help of the MultiVendorX Invoice module, vendors have the option of overriding your template settings. This allows vendors to make changes to the default invoice slip created by you. Let’s take a look at what a vendor needs to do to add a personal touch to the invoice slips.
To start with vendors need to visit their store dashboard and navigate to Store Settings. From the Store settings menu list, they will find the Invoice menu option. This will redirect the vendor to the PDF Invoice page where the vendor can edit their invoice style and settings.
Just like the admin the vendor can customize his/her Invoice. The customization includes –
Select preferred Invoice template – Here vendors can select their preferred invoice template. Once they select the template, they can take a glance at the template of their choice by selecting the Click here to see preferred template view link.
Logo – The Logo option lets vendors upload their brand logo or picture.
The next few options are checkboxes the vendor can click to allow customers to view certain information. These options are –
Subtotal – Enabling this option will display the total amount of purchase on the vendor’s invoice slip.
Discount – The vendor can enable this option to view the discounted amount or percentage.
Tax – The vendor can view the tax amount added to the invoice by selecting this option
Shipping – Enabling this amount will let the vendor view the shipping amount.
Payment Method – By enabling this option the vendor can view the payment method used to pay the order.
Terms and Conditions – In the terms and conditions section the vendor can add their company policy or any terms and conditions they deem as necessary.
Show Customer Note – If this option is enabled, then it will display the note included by the customer at the time of purchase
Finally, vendors can click on the Save Options button that will update their preferences.
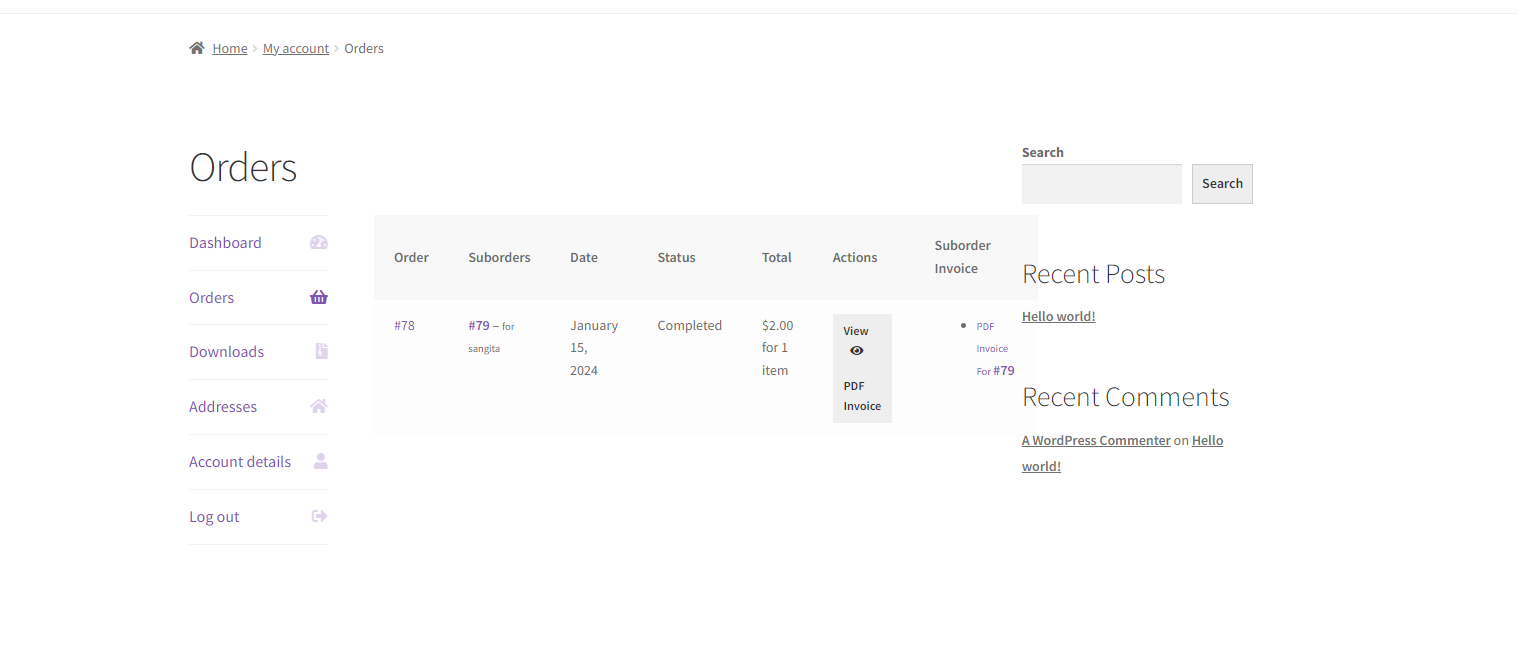
As explained in the previous section Admin, Vendors, and Customers can download the invoice slip from the website. Let us take a look at the procedure used by them to make this possible.
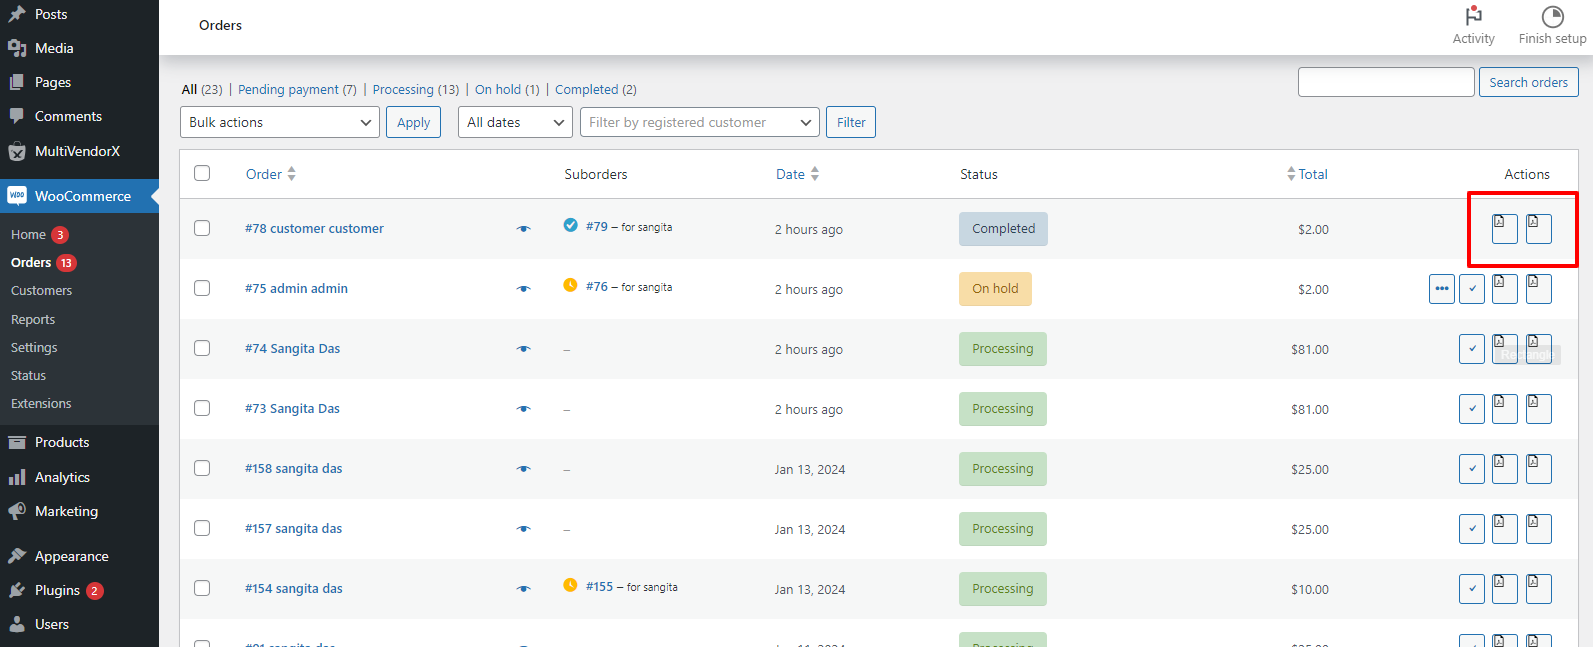
Go to the Admin Dashboard and then navigate to the WooCommerce menu option. Clicking on the WooCommerce option will display the WooCommerce menu list. From the WooCommerce menu select the Orders option.
On the Orders page, you can select the name of the main order identification number of the order whose invoice slip you would like to download.
Selecting the order id will redirect you to the order’s order details page. On one side of the page, you can view the invoice download options. These options include
For Order – Selecting this option will allow you to view the order details of all the vendors from whom the customer has purchased the product.
For Vendor X – This option lets you view the invoice slip where only the order details of Vendor X is present
For Vendor Y – Similar to for Vendor X option, you can view the order details of Vendor Y, if you choose this option.
Similar to downloading the invoice slip you can also download the packaging slip by selecting the PDF Packaging Slip button.
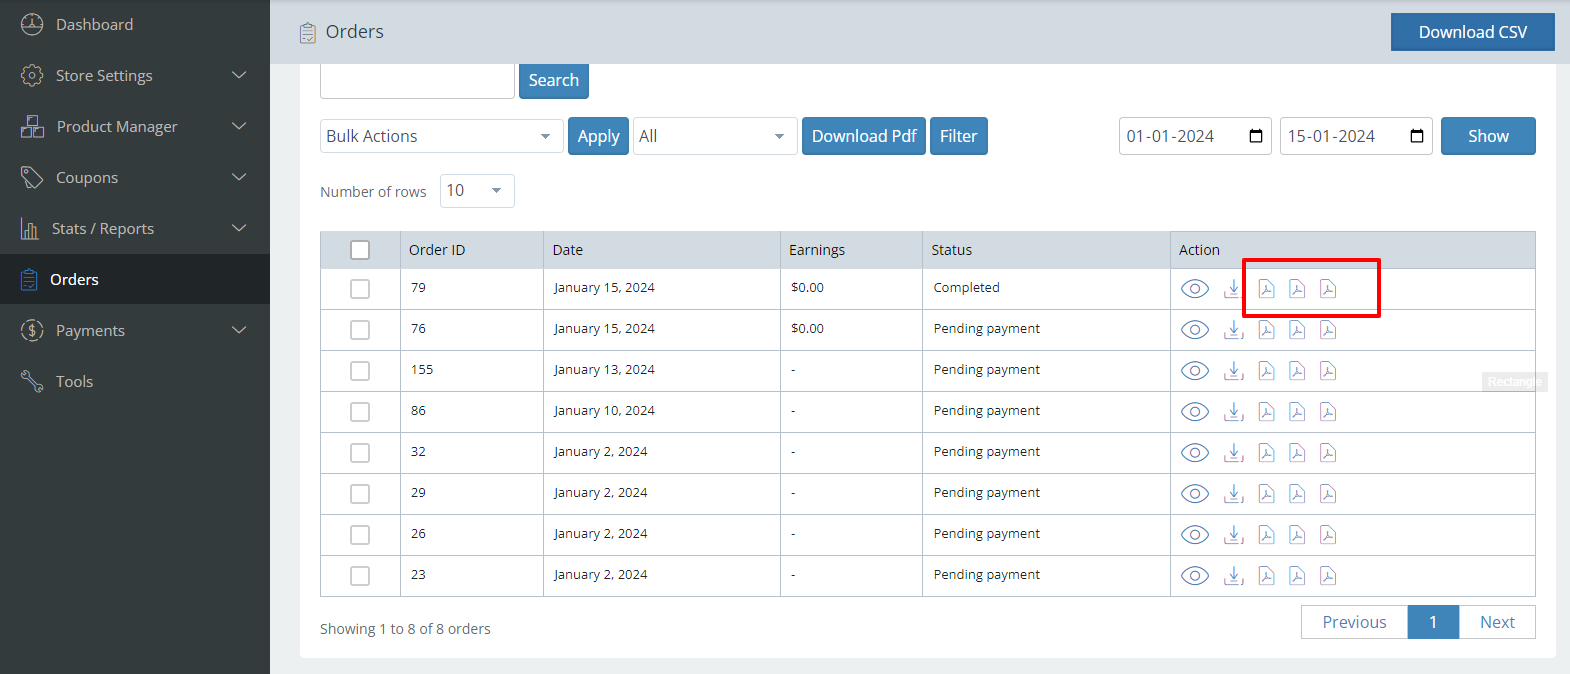
To download the Invoice Slip from the Vendor end. The vendor must –
Go to the vendor dashboard and select the Orders menu option. By selecting the Order option he/she would be directed to the Order page.
On the Order page, the vendor can navigate to the order log’s action section. Here the vendor can select the PDF icon to download the invoice slip.
Similar to downloading the invoice slip, the vendor can follow the same instructions but must click on the packaging slip PDF icon to download the packaging slip.
Vendors can download individual as well as bulk invoices using the bulk action. Vendors also have the option to download the packing slip using the bulk action.