Brief Introduction #
PayPal Masspay is a payment method that allows you to make multiple payments to multiple vendors at the same time. This is a great way to make sure that all of your payments are made on time, and it can also help you to avoid any late fees that might be associated with making multiple payments separately. To learn more about how to use PayPal Masspay, keep reading this document.
PayPal Masspay Configuration #
Mass Payment is a service of PayPal that lets you pay multiple users/vendors at once. It is fast, convenient and allows for automatic payments. Enable and configure this plugin to use this payment method.
Enable PayPal Masspay #
To enable the Paypal Masspay option on your marketplace follow the given steps –
- Go to the admin dashboard and hover over the MultiVendorX menu option until the submenu pops up. From the MultiVendorX menu list, choose the Module option.
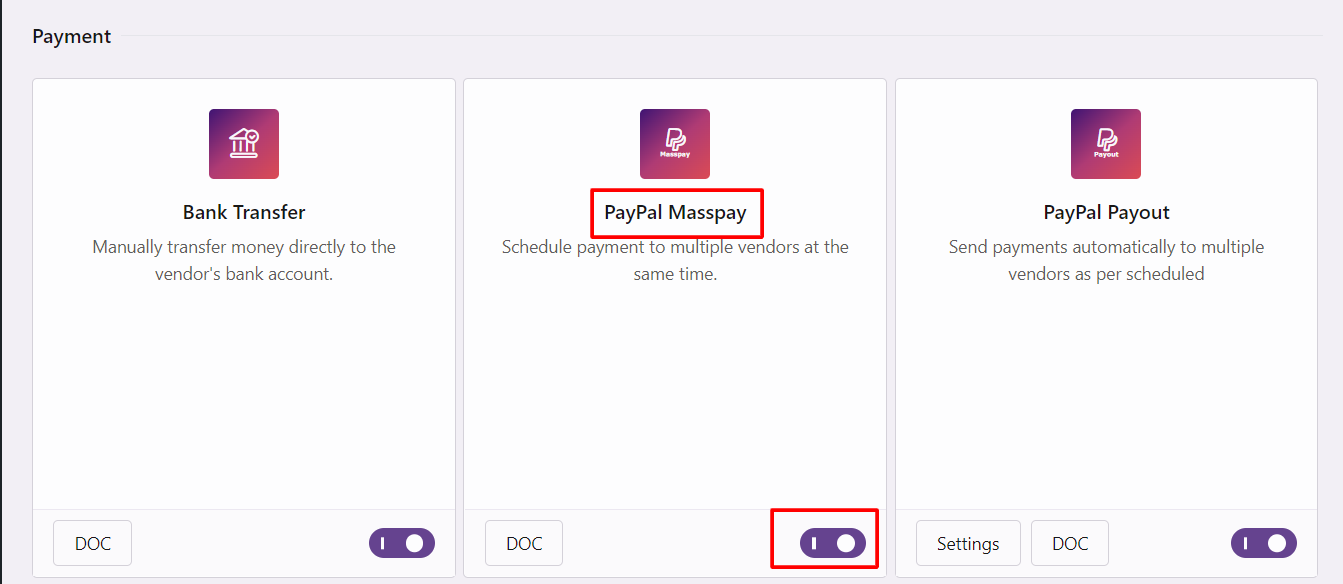
- On the Module Page, go to the Payments section and enable the option Paypal Masspay.
PayPal Masspay Setup #
Once the PayPal Payout option is enabled, you can select the Setting option that appears. This will transport you to the Payment page where the following configuration would be carried out.
- Goto PayPal Sandbox account and access your keys from here https://developer.paypal.com/dashboard/accounts
- On the Payments page, navigate to the Paypal Payout tab and add the API username, password and signature. To get your API keys, follow the steps given below.
- Before filling in the above fields run a quick test of your Paypal account by selecting the Enable Test Mode option
- Enable the Asynchronous mode for new PayPal accounts, it is mandatory as per PayPal guidelines, to have asynchronous mode enabled as the synchronous mode is deprecated, while for older accounts both synchronous and asynchronous modes are available and hence, we’ve left it up to you to decide.
- Enable Test Mode – Enable the test mode before switching to Live Mode. This will help you avoid unnecessary mistakes.

Switch from Test Mode to Production or Live Mode #
To switch your account from test mode to live mode follow the given steps
- Login to your Paypal account and select the tool Tab. From there choose the All Tools options
- Once the All Tools Page opens go to API Credentials
- On the API Credentials page select Manage API Credentials in the NVP/SOAP API Integration (Classic) section
- As soon as the Manage API Credentials link is selected you will be able to view your live API username, password and signature information
- Copy-paste the information into your MultiVendorX Paypal Masspay Gateway Page and select the save changes option
- Now you have a fully functional mass-pay account


Leave a Reply
You must be logged in to post a comment.