


Brief Introduction #
Products and listings are the core of your marketplace. With MultiVendorX, admins can control how stores create, edit, publish, and manage products across the marketplace.
These settings help maintain a structured workflow between Admins, Store Owners, and Customers.
This system gives marketplace owners full control over:
- What stores can do with products
- What types of products can be created
- How product data is structured
- How listings appear across the marketplace
- How multiple stores interact with the same product
This ensures your marketplace stays structured, scalable, and aligned with your business model.
Configuring Store Product Permissions #
Go to :
MultiVendorX → Settings → Marketplace →Store Permission
From here, admins can control what actions stores are allowed to perform.
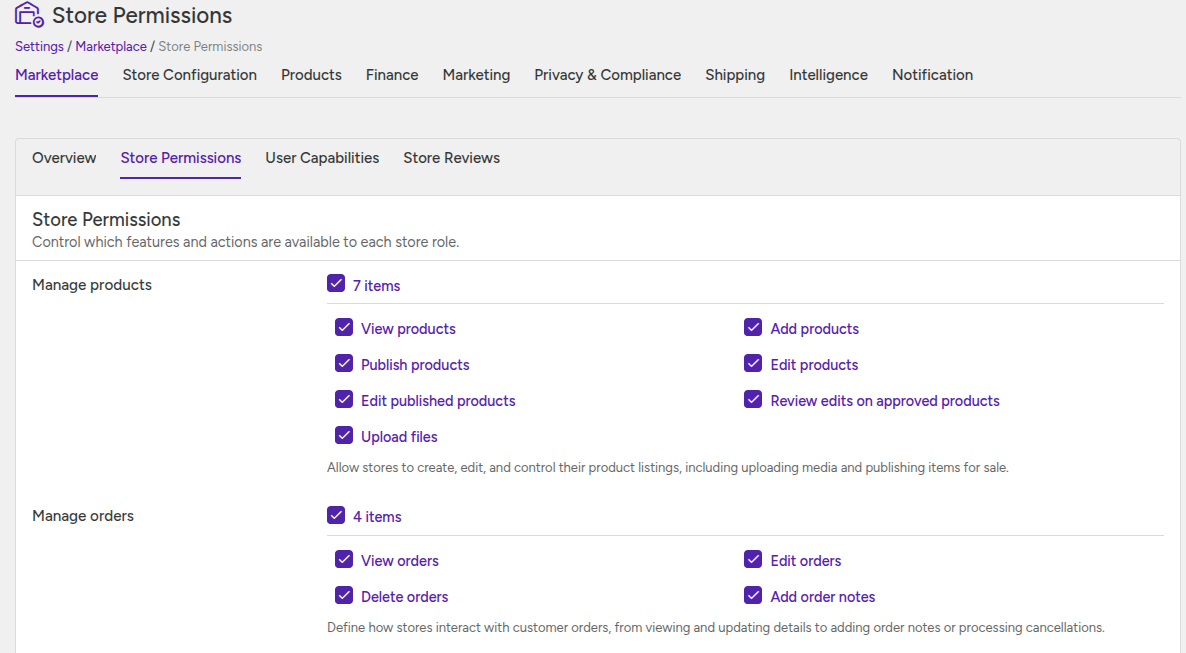
Product Management Permissions #
Admin can control whether stores are allowed to:
- View Products – Allow stores to access and manage their product dashboard.
- Add New Products – Allow stores to create new products from their dashboard.
- Edit Existing Products – Allow stores to edit draft or pending products.
- Edit Published Products – Allow stores to update already published products.
- Publish Products Directly – Products go live instantly without admin approval.
- Review Product Updates – Updated products require admin approval before changes appear publicly.
- Upload Media and Files – Allow stores to upload images, videos, and downloadable files.
Product Submission Workflow #
The product workflow changes depending on admin permissions.
When Direct Publishing is Enabled
- Products become live immediately after creation.
- Customers can purchase products instantly.
When Admin Approval is Required
- Products stay in pending status after submission.
- Admin reviews and publishes products manually.

Configuring Product and Listing Preferences #
Go to:
MultiVendorX → Settings → Products → Product/Listing Preferences
This section controls what product types stores can create.
This section controls the fundamental nature of your marketplace (physical, digital, or hybrid).
Product Types:
- Virtual Products – Products that do not require shipping.
- Downloadable Products – Products customers can download after purchase.

Managing Product Editing Sections #
Admins can control which product sections appear on the store product editing page.
Available Sections:
- General Information – Product title, description, and pricing.
- Stock and Inventory – SKU, stock quantity, and availability.
- Related Products – Upsells, cross-sells, and related products.
- Policies – Return, refund, and warranty policies.
- Product Tags – Product search and filtering tags.

Store Owner Experience #
After permissions are configured:
- Store owners can create and manage products from their dashboard.
- Products may publish instantly or wait for admin approval based on marketplace rules.
- Customers can view products once they are approved or published.
This workflow helps admins maintain marketplace quality while giving stores controlled product management access.


