


Brief Introduction #
Managing payments in a multi-store marketplace can be complex, especially when it comes to splitting and distributing funds. The Stripe Marketplace module simplifies this by enabling secure, real-time payment processing and automated fund distribution. With Stripe, store owners can receive payments instantly while ensuring a seamless and secure checkout experience for customers.
Benefits #
- Real-Time Split Payments – Automatically distribute payments between admin and store owners at the time of checkout.
- Card Payments Support – Allow customers to pay using debit and credit cards.
- Secure Transactions – Built-in fraud protection and security provided by Stripe.
- Flexible Account Types – Supports multiple Stripe Connect account types to suit different marketplace needs.
Stripe Marketplace Configuration (Admin End) #
To start using Stripe Marketplace, navigate to the Modules page of MultiVendorX and enable the Stripe Marketplace payment option from the Payment Management section.
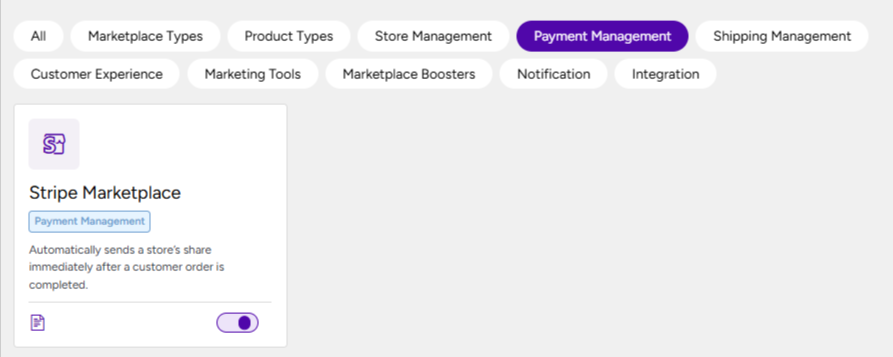
Once the Stripe Marketplace module is activated, the admin needs to configure the payment settings from the dashboard.
Navigate to:
MultiVendorX → Settings → Finance → Withdrawal Methods
From here, enable the Stripe Marketplace option. After enabling it, you will need to provide the required Stripe credntials and configure the settings as described below.
Payment Configuration #
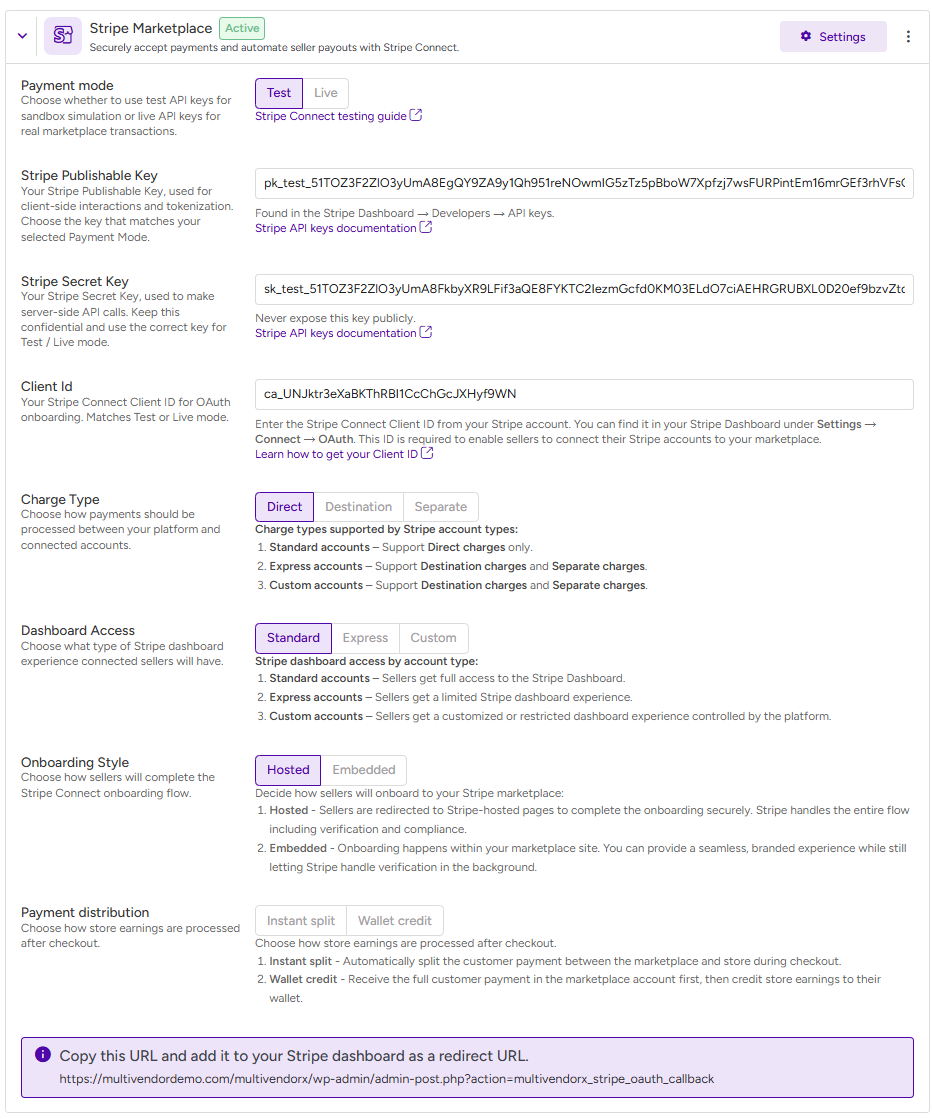
The following fields are required to establish a secure connection with Stripe:
- Payment Mode
Select whether you want to use Test (Sandbox) mode or Live mode. Test mode is used for simulation and development, while Live mode is used for real transactions. - Stripe Publishable Key
This key is used for client-side interactions and payment data tokenization. Ensure that you use the correct key based on the selected payment mode.
You can obtain this from your Stripe Dashboard:
https://dashboard.stripe.com/test/apikeys - Stripe Secret Key
This key is used for secure server-side API communication. Keep it confidential and ensure it matches your selected mode (Test or Live).
Available at:
https://dashboard.stripe.com/test/apikeys - Client ID
This is your Stripe Connect Client ID used for onboarding store owners via OAuth. Make sure it corresponds to the selected mode.
Payment Flow Configuration #
- Charge Type
Defines how payments are processed between the marketplace and connected store owner accounts. Supported charge types based on account type:- Standard Accounts – Support Direct Charges only
- Express Accounts – Support Destination Charges and Separate Charges & Transfers
- Custom Accounts – Support Destination Charges and Separate Charges & Transfers
Dashboard Access #
This setting determines the level of access store owners have to the Stripe dashboard:
- Standard Accounts – Full access to the Stripe Dashboard
- Express Accounts – Limited dashboard access
- Custom Accounts – Fully controlled or restricted access managed by the admin
Onboarding Configuration #
- Onboarding Style
Choose how store owners will complete the Stripe onboarding process:- Hosted
Store owners are redirected to Stripe-hosted pages where Stripe handles the entire onboarding, including verification and compliance. - Embedded
Onboarding takes place within your marketplace, offering a more seamless and branded experience while Stripe manages verification in the background.
- Hosted
To configure the redirect URL, copy it from your Stripe settings page and use it accordingly:
https://dashboard.stripe.com/test/settings/connect/onboarding-options/oauth
These settings allow you to fully control how payments are processed, how store owners are onboarded, and how funds are managed within your marketplace.
Store Owner Configuration #
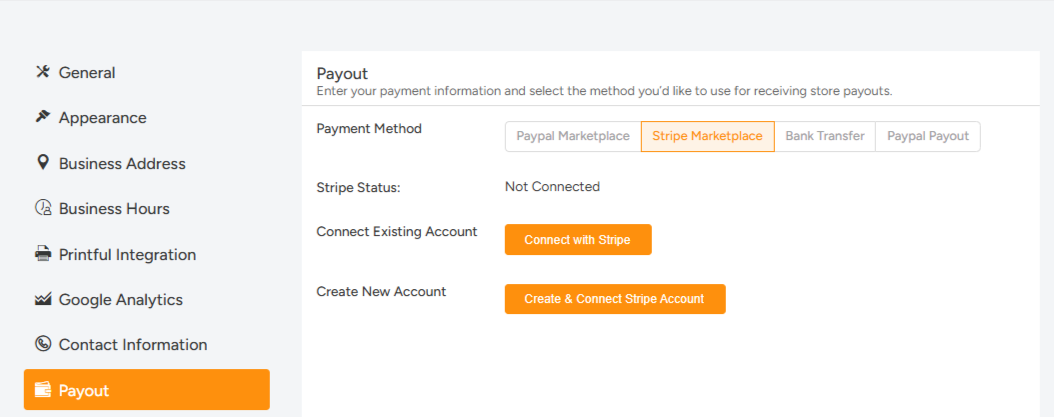
To start receiving payments, store owners need to connect their Stripe account from their dashboard.
They can navigate to Store Dashboard → Settings → Payout, select Stripe Marketplace, and proceed with the onboarding process.
From here, store owners will have two options:
- Connect with Stripe – Use this option to connect an existing Stripe account.
- Create & Connect Stripe Account – Use this option to create a new Stripe account and connect it to the marketplace.
Once the onboarding is completed successfully, the Stripe account will be linked, allowing the store owner to receive payments.
This integration ensures a smooth, secure, and flexible payment experience for both marketplace owners and store owners.


