





Brief Introduction #
A smooth onboarding experience is essential for attracting and retaining new stores in your marketplace. A complex or confusing registration process can discourage potential sellers, even before they begin. With MultiVendorX, store registration is designed to be simple, flexible, and fully customizable. The admin can tailor the registration form to fit marketplace needs, adding multiple field types, storing responses automatically, and updating the form whenever required. This ensures that store owners can get started quickly, while you maintain full control over the information collected.
This setup includes:
- Choosing an approval method
- Defining the registration form
- Managing store applications
Registration form setup #
You can configure the store registration form from:
Settings → Store Configuration → Registration
Mandatory Field
The following field is always required and cannot be removed:
- Store name
Store Information Fields
You can also add predefined store-related fields such as:
- Name
- Description
- Phone
- PayPal Email
- Address
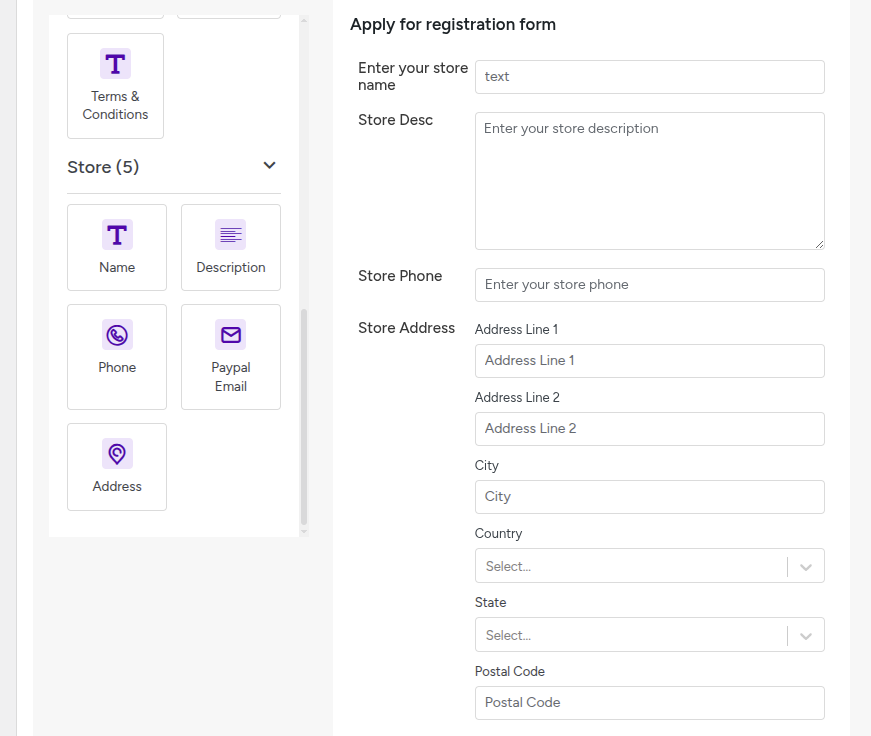
Available field types : You can build the form using the following input types:
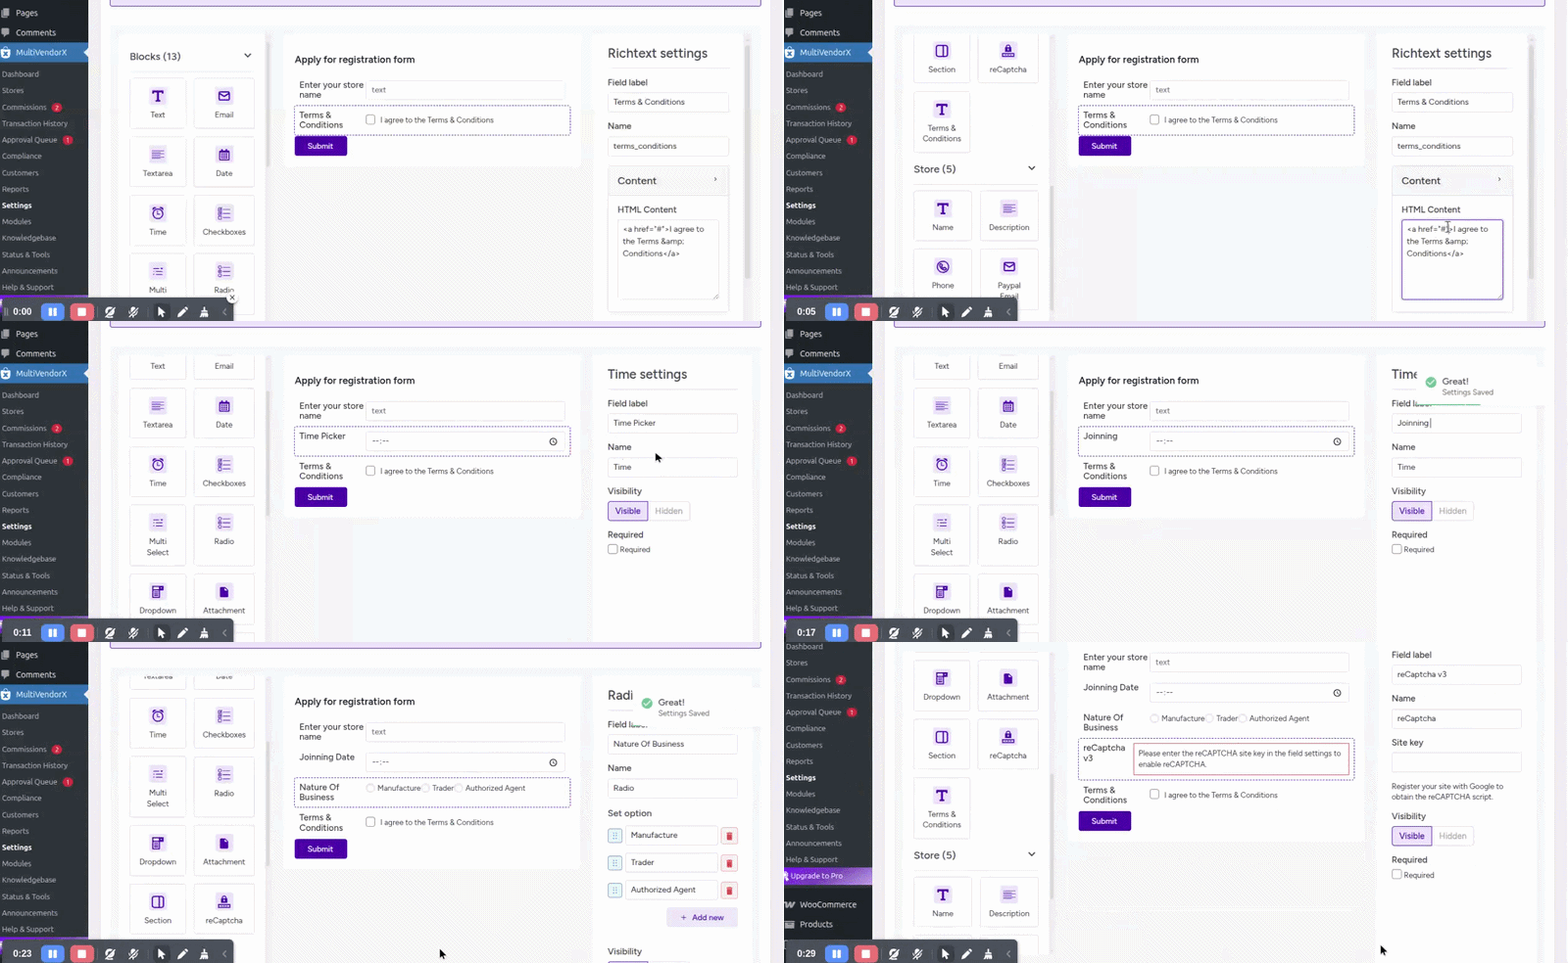
- Basic fields
- Text
Textarea
Date
Time
Selection fields :
Checkboxes
Multi select
Radio
Dropdown
Advanced fields
- Attachment (file upload)
- Section (for grouping fields)
- reCAPTCHA (for spam protection)
- Terms and Condition
Store Approval Method #
Choose how store applications are approved from:
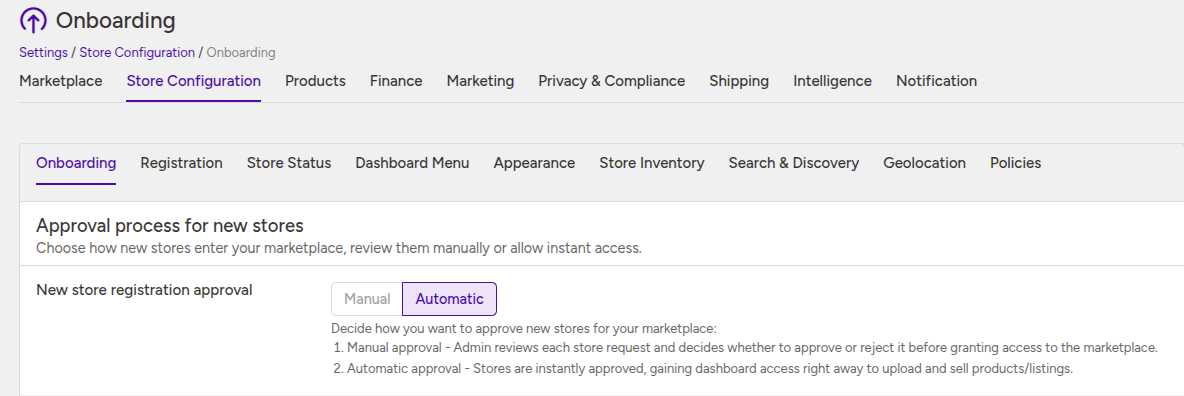
Settings → Store Configuration → Onboarding
- Manual approval : When enabled, every store application must be reviewed by the admin.
- How it works:
- Store owner submits the registration form
- The store is created with a pending status
- The store owner is redirected to the dashboard with a pending notice
- Admin reviews the application before granting access
- This option is useful when you want to maintain control over which stores can operate in your marketplace.
- How it works:
- Automatic approval : When enabled, store applications are approved instantly.
- How it works:
- Store owner submits the registration form
- The store is approved immediately
- The store owner gets full dashboard access and can start adding products/listings
- This option is suitable for marketplaces that prefer faster onboarding.
- How it works:
Store Registration Process #
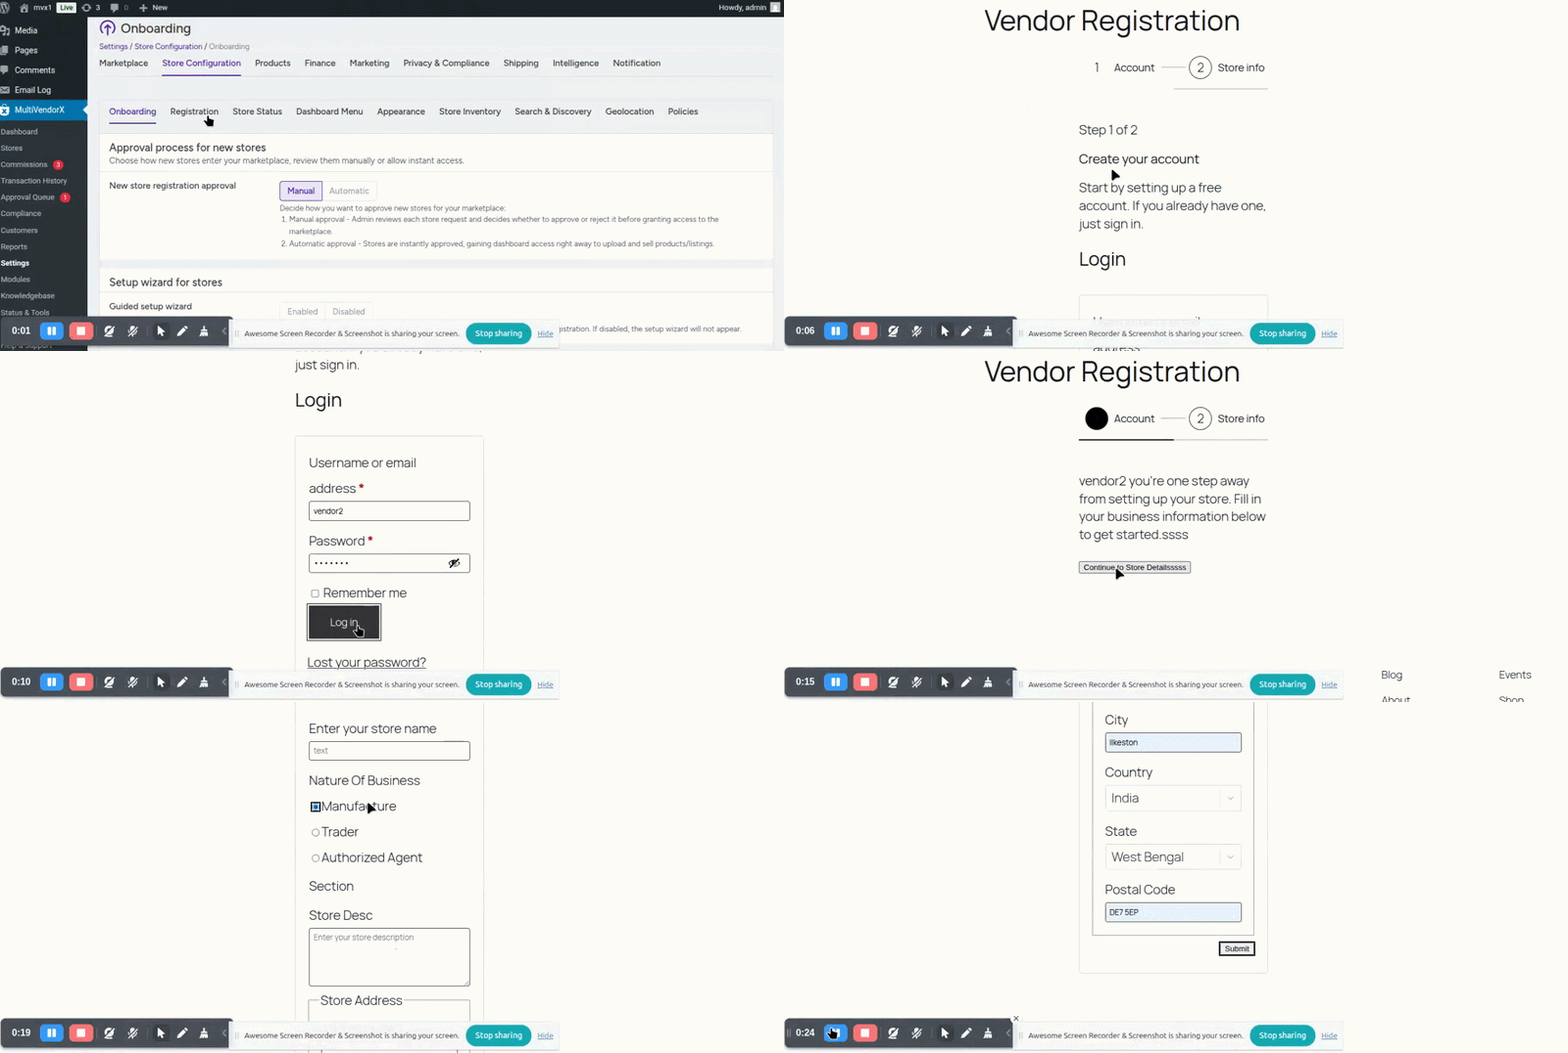
1. Login or Create an Account #
- Login or create an account
- Before applying for a store, the user must either sign in or create an account.
- Store owners will first see the account access section:
Start by setting up a free account. If you already have one, just sign in.- Login fields
- Username or email address
- Password
- Remember me
Once logged in, the user can continue to the store registration form.
- Apply for a store
- After login/signup, the user is taken to the store registration form.
- The registration page informs the user that:
- This information will be reviewed by our team before your store goes live. Please fill it in accurately.
- The store owner must then complete the registration form configured by the admin.
After Submission #
If automatic approval is enabled #
- The store is approved instantly
- The store owner gets full dashboard access
- They can start adding products/listings immediately

If manual approval is enabled #
- The store is created with a pending status
- The store owner is redirected to the dashboard
- A pending approval message is displayed
- The store cannot start selling until approved.