Brief Introduction #
In today’s competitive marketplace, advertising plays a vital role in capturing customer attention and driving sales. The Advertise Product module of MultiVendorX Pro empowers stores to promote their products effectively within the marketplace, ensuring greater visibility among potential buyers. By showcasing highlighted or sponsored products, this feature not only boosts sales opportunities but also helps store owners strategically reach their target audience, ultimately enhancing overall marketplace engagement and revenue.
Requirements #
Configuration from the Admin dashboard #
To configure the Advertise Product module, follow the steps below:
- From the Admin Dashboard, navigate to MultiVendorX and click on the Modules submenu.
- In the Modules page, scroll to the Marketplace Boosters section and enable the Advertise Product module.
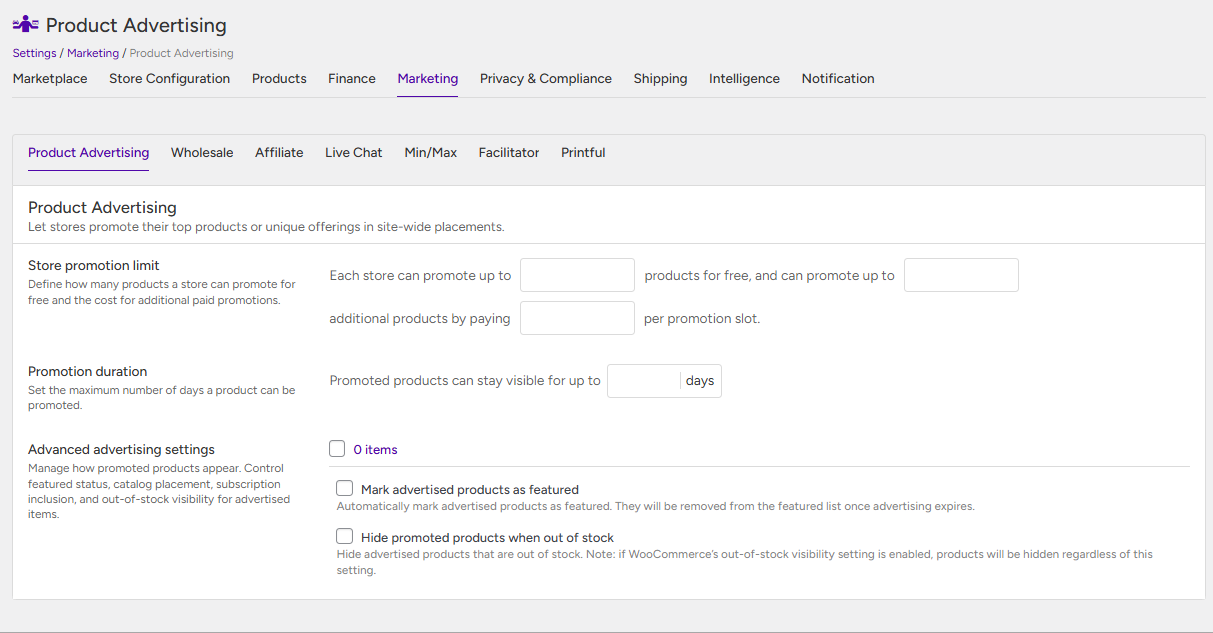
- Once the module is activated, go to the Settings submenu, open the Marketing section, and scroll down to Product Advertising.
- Configure the following settings:
- Store promotion limit – The admin can define the number of free advertising slots available to stores, specify how many paid advertisement slots can be added, and set the pricing for those paid advertisements.
- Promotion duration – Define how long a product can remain advertised.
- Advanced advertising settings:
- Mark advertised products as featured – Automatically mark advertised products as featured. Once the advertising expires, they will be removed from the featured list.
- Hide out-of-stock advertised products – Hide advertised products that are out of stock. Note: if WooCommerce’s out-of-stock visibility setting is enabled, products will be hidden regardless of this option.
- Mark advertised products as featured – Automatically mark advertised products as featured. Once the advertising expires, they will be removed from the featured list.
Adding Product Advertisement From Admin Dashboard #
The admin can add advertisements for store products directly from the dashboard. To do this, navigate to the Advertisement section from the sidebar and click on “Add New”, select the desired store, choose the product from that store, and click Save.
Once added, the advertisement will be applied to the selected product, and it will appear at the top of the store owner’s storefront page.
Adding Advertisement from Store Dashboard #
Once the admin has enabled the Product Advertising module and configured its settings, store owners can add advertisements for their products directly from their dashboard.
For free advertisement slots:
- Log in to the store dashboard.
- Navigate to Products → All Products.
- Under the Actions section, click on the Advertise button for the desired product.
- If a free slot is available, the advertisement will be applied to the product instantly.
For paid advertisements:
- Follow the same steps and click on the Advertise button for the selected product.
- The product will be added to the store owner’s cart.
- Complete the purchase process.
- Once the payment is successful, the advertisement will be applied to the product.

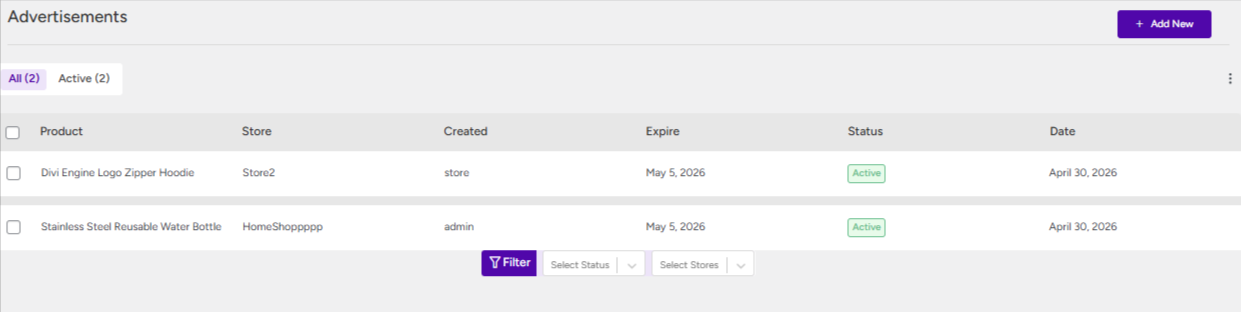
Advertisement Management from the Admin Dashboard #
The admin can manage all advertisements directly from the dashboard. From the Advertisement page, they can easily sort advertisements added by the admin or by store owners, and also filter advertisements based on individual stores.