


So you’ve just landed on your Store Dashboard – now what?
Don’t worry, you don’t need to figure everything out at once. Think of this dashboard as your store’s control room. Once you set things up properly, everything else becomes much easier.
Let’s walk through it the way most successful store owners actually do 👇
First things first – set up your store #
Before adding products or worrying about sales, spend a few minutes in “Settings“. This is where your store gets its identity.

Start with General #
Give your store a name, a clean link (URL), and a short description.
This is what customers will see first – so even a simple, clear description works better than overthinking it.
Also, don’t miss the message to buyers. A small note like
“Thanks for supporting handmade products 💛”
can make your store feel more human.
Appearance – Make your store look good #
Now let’s make it presentable.
Upload:
- A profile image (your logo or brand image)
- A banner (something that represents your store vibe)
You don’t need fancy designs – even a clean image works. The goal is simple:
👉 Make your store look real and trustworthy.
Add your Business Address #
This isn’t just a formality.
Your location helps customers:
- Trust your store
- Understand delivery expectations
Just fill in your address, city, and location properly – takes less than a minute. Also, this information will be displayed on your store banner section, so customers can quickly see where your store is based while browsing your storefront.
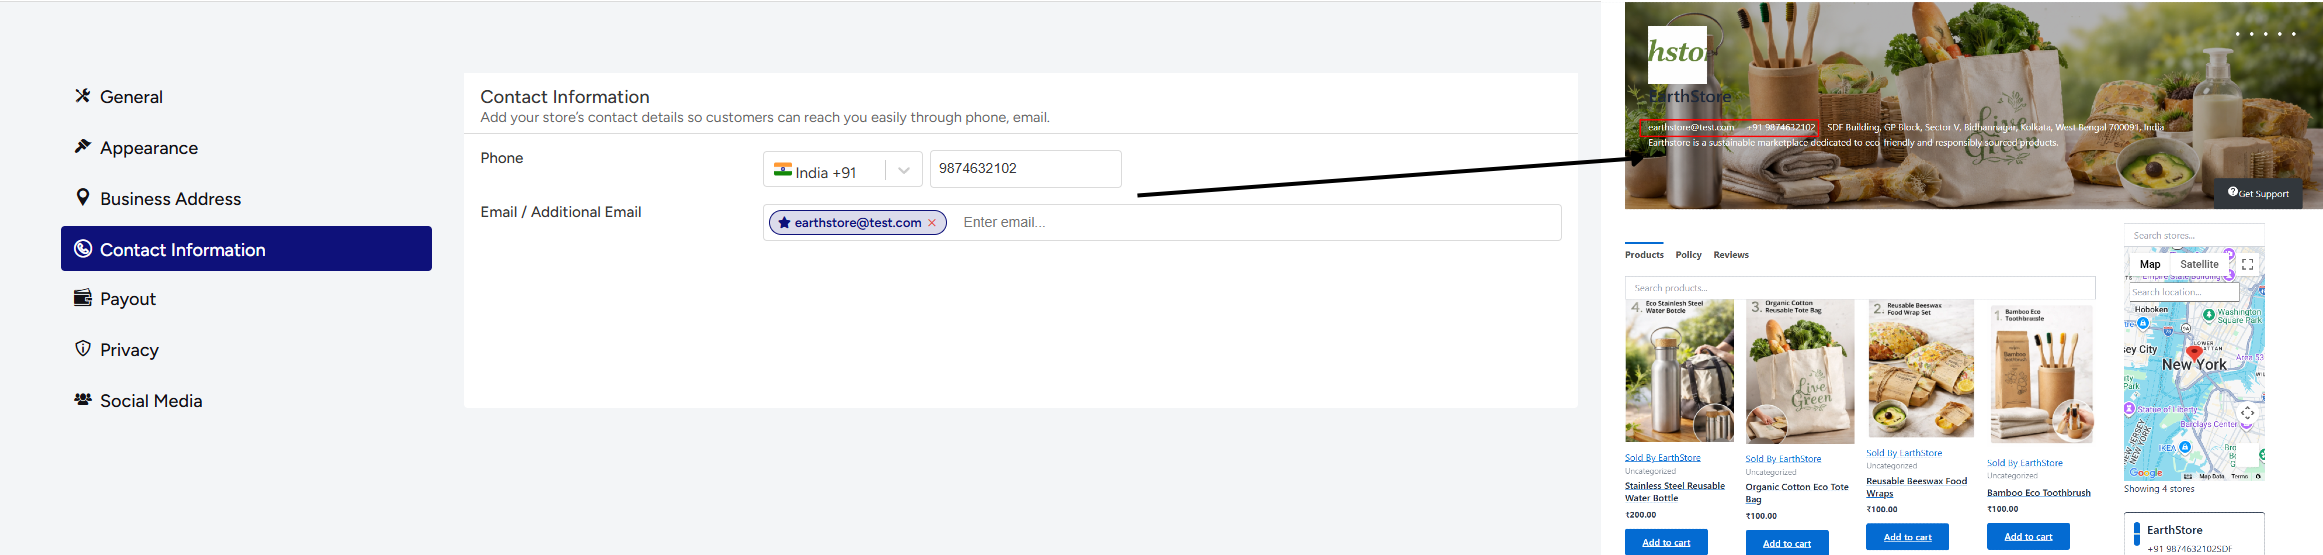
Add contact details #
If a customer has a question, how do they reach you?
Add:
- Phone number
Even if they never contact you, just having this visible builds confidence.
Payout – Set up how you’ll get paid #
Now the important part – your money.
Choose your payout method (like Bank Transfer) and enter your details carefully.
No setup = no payouts. So don’t skip this.
Configure your payout method (like Bank Transfer or PayPal) by entering the required account details so your store earnings can be processed and transferred without delays. For detailed setup steps, refer to the payout configuration guide.
Privacy – Add your store policies #
This is where many store owners get lazy – but this part actually saves you from future headaches.
Add:
- Shipping policy
- Refund policy
- Cancellation/return policy
It doesn’t have to be complicated. Just be clear.
For example:
“Returns accepted within 7 days for damaged items.”
Simple = effective.
Link your social media #
If you already have social profiles, connect them here.
It helps customers:
- Explore your brand
- Trust your store more
If you don’t have any yet, you can always come back later.
Dashboard – Your quick snapshot #
When you open your dashboard, think of it as your store’s daily health report. Everything important is shown at a glance – earnings, orders, performance, and activity – so you always know how your store is doing without digging into reports.
At the very top, you’ll see a warm greeting like:
“Good Afternoon, Monica!”
Right below that, your current store and active reporting period are shown (for example: last 30 days vs previous 30 days). This helps you instantly understand whether your store is improving or slowing down.
Key Performance SnapshotThis is the first set of numbers you’ll notice – your store’s core performance: #
- Total Revenue – Your total sales income for the selected period
- Total Orders – Number of orders received
- Store Views – How many people visited your store
- Commission Earned – Your earnings after marketplace commission
Each metric also shows a comparison with the previous period, so you can easily track growth.
Sales Overview #
Here you get a simple visual breakdown of your performance:
- Earnings
- Orders
- Sales trends over time
This helps you understand when your store performs best and how sales fluctuate over time.
Last Withdrawal #
This section shows your payout history status.
If you haven’t withdrawn yet, you’ll see a message like:
“Earnings will appear here once you make a withdrawal.”
Once you start withdrawing, this area will show your latest payout details.
Visitors Map #
A visual representation of where your customers are coming from.
It helps you understand:
- Which regions generate the most traffic
- Where your customers are located globally
This is useful for planning marketing or shipping strategies.
Recent Orders #
This is your real-time order activity panel.
You can see:
- Order ID
- Date
- Products purchased
- Quantity
- Order status (Processing, Completed, etc.)
- Total amount
Think of this as your live order feed — everything happening right now in your store.
Best-Selling Products #
Here you can quickly identify what’s working.
It shows:
- Product names
- Number of sales
This helps you understand:
👉 what customers love
👉 what you should restock or promote more
Commission Overview #
This section breaks down your earnings structure:
- Commission Earned
- Commission Refunded (if any)
- Total Revenue split
It gives you a clear picture of how your earnings are distributed between store revenue and marketplace commission.
Admin Announcements #
Important updates from the marketplace admin appear here.
If there are no updates, you’ll see:
“You’re all caught up – check back for updates!”
Pending Refunds #
Shows any refund requests currently in process.
You’ll see:
- Customer name
- Reason (if provided)
- Date
This helps you track refund-related actions easily.
Top Customers #
Highlights your most valuable customers based on order activity.
This helps you:
- Identify repeat buyers
- Build stronger customer relationships
Store Activity #
This is your activity timeline.
It shows everything happening in your store as it grows — orders, updates, and interactions.
At the beginning, it may say:
“Activity will show up here as your store grows!”
Latest Reviews #
Customer feedback section.
As soon as you start receiving reviews, they will appear here. This helps you:
Understand customer satisfaction
Build trust
Improve products
Now you’re ready – let’s add products #
Head over to Products.
This is where your store actually comes alive.
Start by:
- Adding your first product
- Uploading clear images
- Writing a simple, honest description
Don’t aim for perfection. Your first goal is to get your products live.
You can always improve later. Read this how-to guide to know more on adding and viewing products.
Want more sales? Use coupons #
Once you have products, try adding a simple offer from Coupons.
Something like:
- 10% off
- ₹100 discount
Even small offers can push customers to complete their purchase. Read this how-to guide to know more on adding and viewing coupon.
Managing orders (Sales) #
When orders start coming in, this is where you’ll spend most of your time.
Inside Sales, you can:
- See who ordered what
- Check order status
- Manage fulfillment
Keep an eye here regularly so nothing gets delayed.
Keep track of your money (Wallet) #
Your Wallet shows everything related to your earnings.
You can:
- Check your balance
- See transaction history
- Track credits and deductions
Whenever you’re unsure about payments — this is your go-to place.


