


Brief Introduction #
Turn all your skeptical website visitors to potential customers with a seamless Live Chat Module presented by MultiVendorX Pro. This Live Chat module allows store owners to have real-time chats with customers, resolving all their doubts and queries.
Requirements #
Configuration from the Admin dashboard #
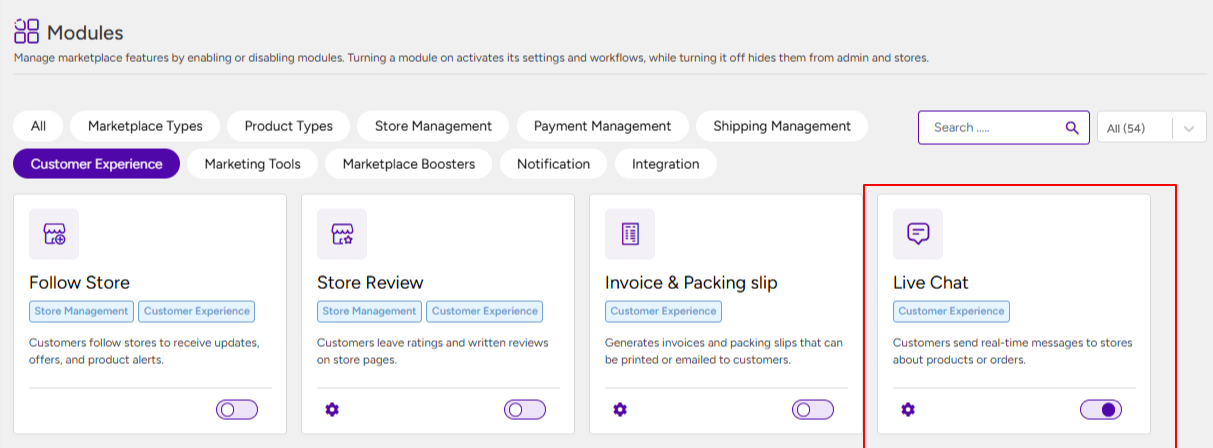
To begin configuring the Live Chat module, follow these steps:
- Go to your Admin Dashboard and navigate to MultiVendorX.
- From the submenu, click on Modules.
- Scroll to the Customer Experience section.
- Enable the Live Chat module.
Once the module is enabled, you can proceed with the configuration:
- Go to the Settings submenu under MultiVendorX.
- Navigate to the Marketing section.
- Click on the Live Chat option.
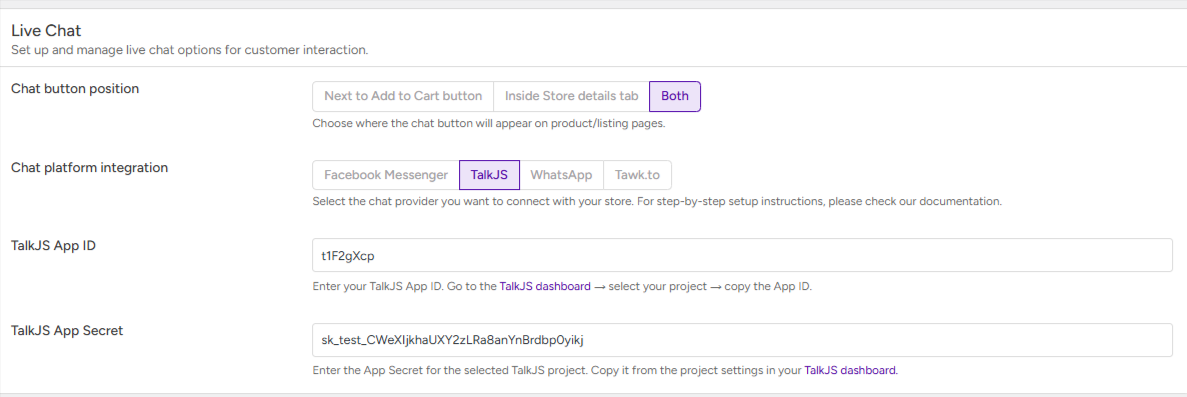
- Configure the below settings
1. Chat Button Position #
Here the admin can choose where they want the chat button to appear:
- Next to the Add to Cart button
- Inside the Store Details tab
- At both locations
2. Chat Platform Integration #
MultiVendorX lets you choose your desired chat provider. These options include:
2.1 TalkJS #
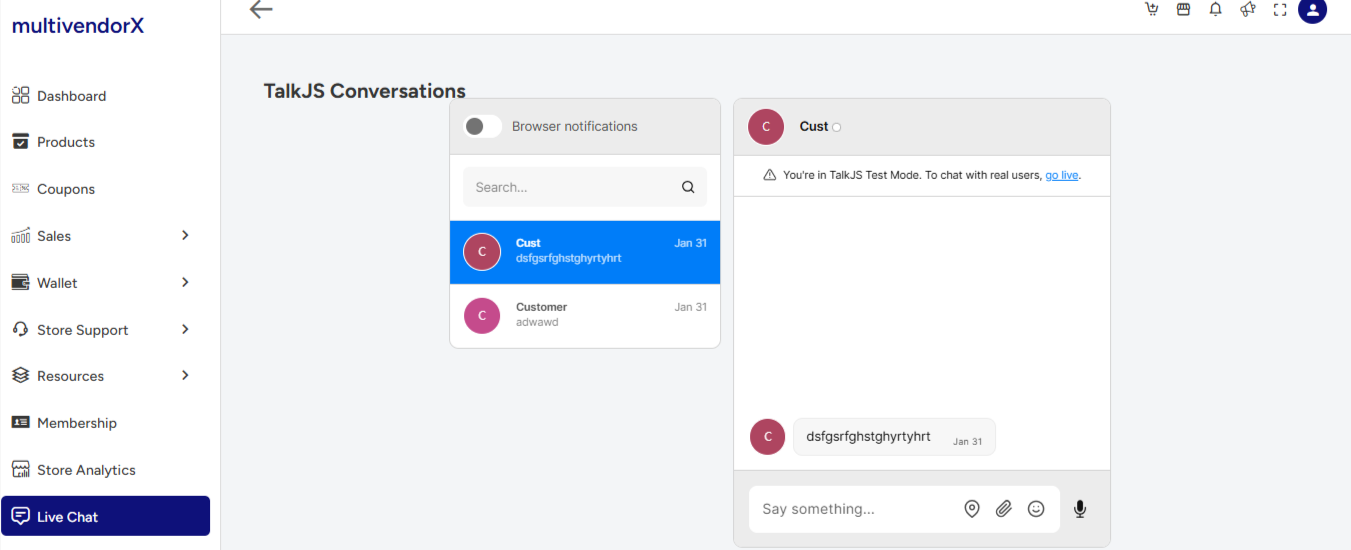
With the TalkJS chat provider, store owners can start conversing with customers almost instantly. Chat history is also stored in their dashboards for reference purposes.
2.2 Facebook Messenger #
This option combines social media with the marketplace, allowing store owner to use Messenger as a business assistant.
2.3 WhatsApp #
Store owners can use WhatsApp to chat one-on-one with customers.
2.4 Twak.to #
Store owners can use tawk.to to manage real-time customer conversations with a centralized chat dashboard and visitor insights.
Configuring TalkJS #
From Admin End #
If TalkJS is your selected chat provider, you need to fill in your below credentials that you can get from here:
- API ID – Obtain your API ID by setting up a free TalkJS account. Copy the test API ID and paste it here.
- API Secret – Obtain the API Secret in the same way and paste it here.
From Store Dashboard #
Store owners can access the Live Chat feature directly from their store dashboard. From there, they can view incoming messages related to their products and communicate with customers in real time.
Configuring WhatsApp #
From Admin Dashboard #
The admin simply needs to enable WhatsApp from the dashboard.
From Store Dashboard #
- Go to Store Dashboard → Store Settings.
- Scroll down and enable the Live Chat option.
- Add the store’s WhatsApp number in the provided field.
Configuring Facebook Messenger #
From Admin Dashboard #
The admin only needs to select Facebook Messenger as the chat provider.
From Store Dashboard #
- Go to the store’s Facebook page and click the Messenger/Chat icon.
- Navigate to Settings → View All Settings → Chat Plugins.
- Copy the Page ID and paste it in Store Dashboard → Store Settings → Facebook Page ID.
- Go back to Chat Plugins, add the vendor’s store URL in the Web Domain section, and click Publish after customizing and setting up automation.
6. Final Step #
Once configured, the chat option is now added to the Store owner’s store. Customers can click the chat button on the store or product pages to start a conversation with the store owner.


