


Printful is a print-on-demand and fulfillment platform that lets businesses create and sell custom products without maintaining inventory. Products such as clothing, accessories, home décor, and more are printed, packed, and shipped directly to customers only after an order is placed.
By integrating Printful with MultiVendorX, you can build a print-on-demand marketplace where store owners can connect their Printful accounts, sync products, and automate order fulfillment directly from your marketplace.
This integration is ideal for creators, artists, apparel brands, and entrepreneurs who want to sell custom merchandise without handling manufacturing or shipping themselves.
In this guide, you’ll learn how to:
- Activate the Printful module
- Configure Printful settings as admin
- Connect Printful from the store dashboard
- Add and manage Printful products
- Understand order and shipping flow
- Track delivery workflow between MultiVendorX and Printful
Activate the Printful module #
To get started, first enable the Printful integration module from your WordPress dashboard.
Navigate to:
MultiVendorX → Modules
Locate the Printful module and activate it.

Configure Printful as admin #
After enabling the module, the marketplace admin needs to complete the initial configuration.
Go to: MultiVendorX → Settings → Marketing → Printful
You may notice a few setup notices at the top of the settings page. These must be completed before the integration becomes active. Let’s dive in!
To connect Printful with MultiVendorX, you need to create an app from the official Printful Developer Portal.
- Open the Printful Developer Dashboard
- Visit the official Printful developer portal: Printful Developer Portal
- Log in using your existing Printful account credentials.
- If you do not already have a Printful account, create one first from the main Printful website.
- You can access your Printful account dashboard here: Printful Dashboard
- Create a new app
- After logging into the developer portal:
- Go to the Apps section
- Click on Create App
- Direct link: Create Printful App
- Add application details
- While creating the app, you will need to enter the following information from your MultiVendorX settings page:
- Navigate to: MultiVendorX → Settings → Marketing → Printful
- Copy these values:
- App URL
- Redirect URI / Redirect Domain
- Paste them into the corresponding fields inside the Printful app setup page.
- Select app permissions
- While configuring the app:
- Enable all available scopes/permissions
- Choose the proper access level
- Avoid using “Printful” directly in the application name
- These permissions are required for:
- Product synchronization
- Order creation
- Shipment updates
- Shipping synchronization
- Store connection authorization
- Copy API credentials
- After creating the app, Printful will generate:
- Client ID
- Client Secret
- Copy both values and paste them
- After creating the app, Printful will generate:

Match currency settings #
Your marketplace currency must match the currency configured in your Printful account.
Go to: WooCommerce → Settings → General → Currency options
Once these configurations are completed, the setup notices will disappear.

Configure Printful as a store owner #
Once the admin setup is complete, store owners can connect their individual Printful accounts.
Navigate to:
- Store Dashboard → Settings → Printful
- Then click on Connect with Printful.
This is a screenshot of Printful settings in store dashboard
Before proceeding, carefully review the notices displayed on the page.
The store owner will then be redirected to Printful to authorize access.
This is a screenshot of Printful authorization screen
After successful authorization, the store will appear as connected inside the Printful dashboard.
This is a screenshot of connected store in Printful dashboard
Note: It is recommended to create a fresh store in Printful instead of connecting an older store. Using an existing store may cause sync conflicts, inaccurate reporting, or order mismatches.

Add products from Printful #
After connecting the account successfully, store owners can start creating products directly from Printful.
You can create products inside your Printful dashboard , configure Shipping and sync them automatically to your marketplace store.

Once the product is created and saved in Printful:
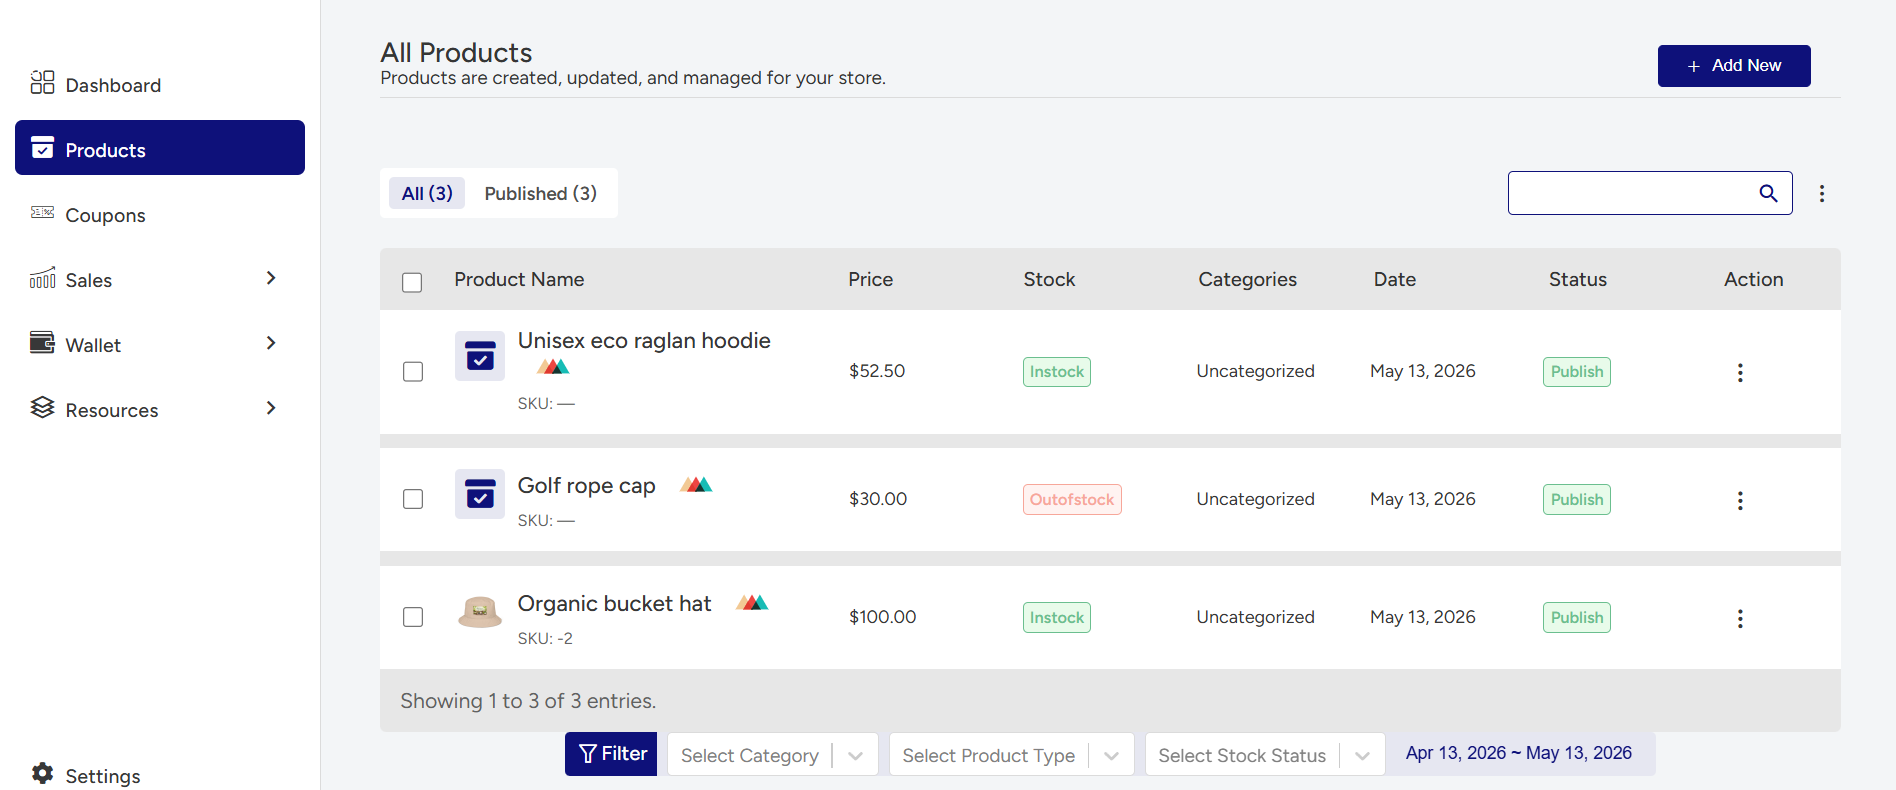
The product will appear in the Store Dashboard → Products section.
Initially, products may appear as:
- Draft
- Out of stock
This is a screenshot of product processing state
After synchronization is completed, the product status will become active and a Printful badge will appear beside the product.
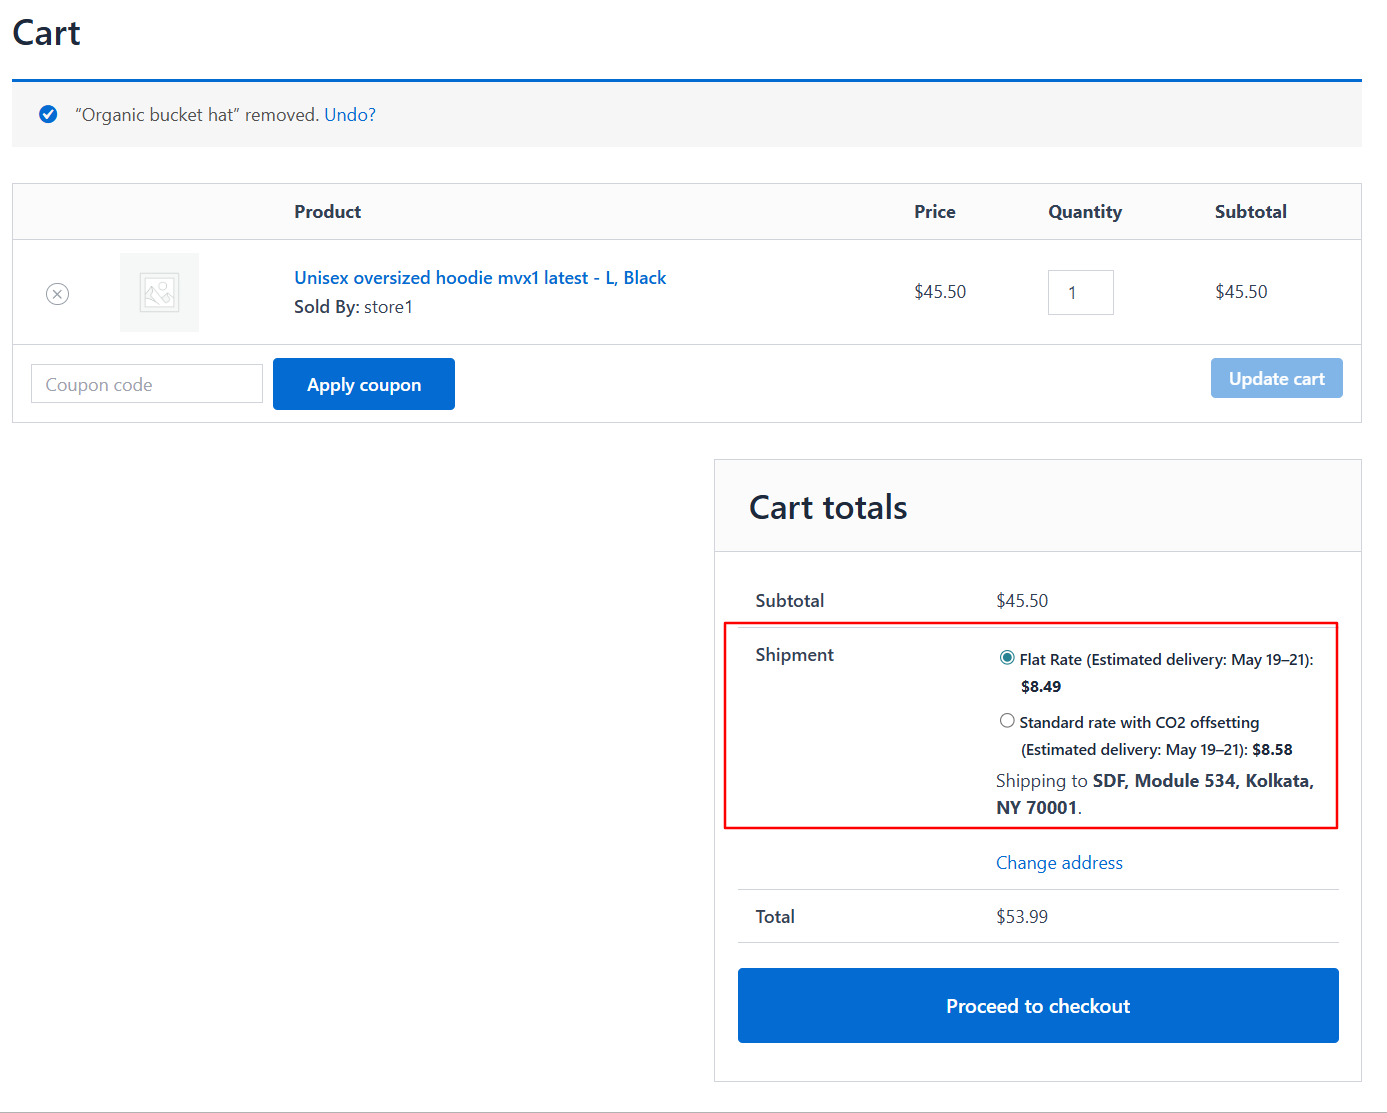
Checkout shipping experience #
Once enabled, customers will see Printful shipping rates directly during checkout.
If the marketplace’s own shipping methods are also enabled, those options will appear alongside Printful rates.
For example:
- Free Shipping
- Flat Rate
- Printful Standard Shipping
Order fulfillment process #
For Printful-connected products, shipping and fulfillment are handled entirely by Printful.
Store owners cannot manually create shipments for those products from the marketplace dashboard.
Non-Printful products must still be shipped manually using the regular marketplace workflow.
When a customer places an order containing Printful items, the order is automatically created in the connected Printful account as a draft order.
To complete fulfillment, the store owner must configure billing information inside their Printful account.


