


Brief Introduction #
The ShipStation integration in MultiVendorX Pro helps marketplace store owners simplify and automate their shipping workflow directly from their marketplace.
By connecting ShipStation with MultiVendorX, store owners can sync orders, generate shipping labels, track shipments, and manage deliveries more efficiently from a centralized shipping platform.
This integration is especially useful for marketplaces handling large order volumes across multiple stores, as it helps streamline shipping operations and improve order fulfillment speed.
Requirements #
Enable the shipstation module from the admin dashboard #
Before store owners can connect their stores with ShipStation, the admin must first enable the ShipStation integration module from the MultiVendorX settings.
To enable the module:
- Log in to the WordPress Admin Dashboard
- Navigate to MultiVendorX
- Select Modules
- Scroll down to the Integration section
- Locate the Shipstation module
- Enable the toggle option
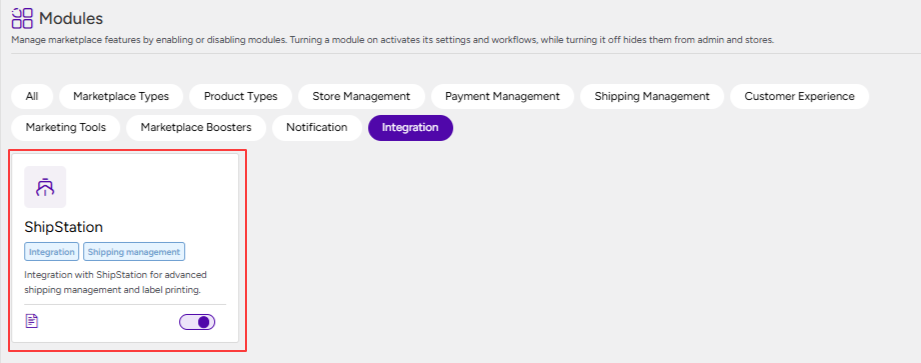
Once the module is enabled, the ShipStation configuration settings will become available inside the Store Dashboard, allowing store owners to connect their stores with their ShipStation accounts and start managing shipping workflows.
Configure Shipstation from the Store Dashboard #
Once the admin enables the ShipStation module, store owners can connect their stores with their ShipStation accounts directly from the Store Dashboard.
To access the ShipStation settings:
- Log in to the Store Dashboard
- Navigate to Settings
- Select ShipStation
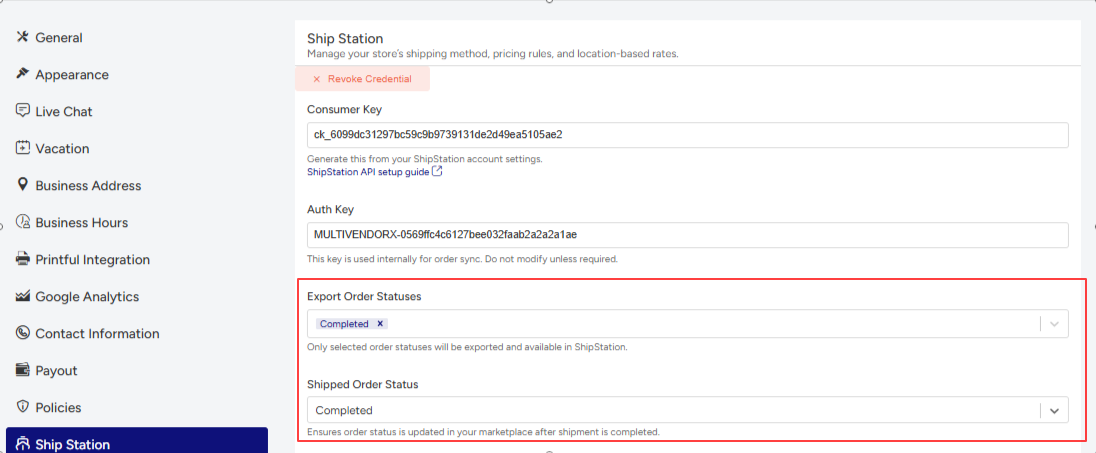
Inside this section, store owners will find the API credentials required for connecting their store with ShipStation.
The following credentials are automatically generated:
- Consumer Key
- Consumer Secret
- Auth Key
These credentials must be used while configuring the store connection in the ShipStation account.
Configure order synchronization settings #
Store owners can also configure how orders should be synchronized between the marketplace and ShipStation.
Export order statuses #
This option allows store owners to define which order statuses should be exported to ShipStation.
Only orders matching the selected statuses will be synchronized for shipping processing.
For example, store owners may choose to export:
- Processing orders
- Completed orders
- Paid orders
This helps prevent incomplete or unpaid orders from being sent to ShipStation.
Shipped order statuses #
This option allows store owners to define which order statuses should be treated as shipped orders.
Once shipment processing is completed through ShipStation, the selected order status can automatically reflect the shipment progress inside the marketplace order workflow.
This helps maintain proper synchronization between:
- Order fulfillment
- Shipping updates
- Marketplace order tracking
Learn How to Connect Your Store to ShipStation #
To begin, visit ShipStation.com. You’ll encounter a ‘Selling Channel’ pop-up enabling you to connect to WooCommerce.
If you already have a ShipStation account, go to Account Settings > Selling Channels > Connect a store or marketplace. Then, locate and choose WooCommerce to proceed with setup.


