





Brief Introduction #
The Advanced Custom Fields integration in MultiVendorX Pro allows admins to extend the product creation experience by adding custom fields to the Store Dashboard product form.
Using this integration, store owners can provide additional product information beyond the default WooCommerce product settings. These extra fields help create more informative product pages and improve the customer shopping experience.
Requirements #
Setting Up Advanced Custom fields #
Once the required plugins are installed and activated, the admin must first enable the Advanced Custom Fields integration module in MultiVendorX.
To enable the module:
- Navigate to MultiVendorX
- Select Modules
- Open the Integration section
- Locate the Advanced Custom Field module
- Enable the toggle option
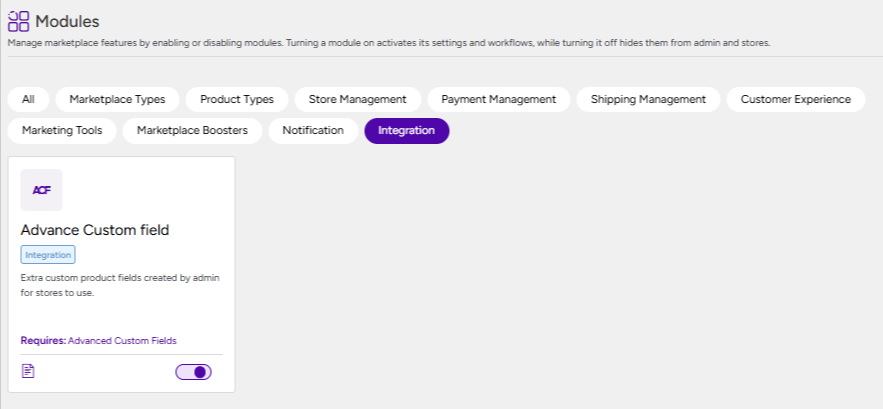
After enabling the module, the Advanced Custom Fields integration becomes active for the Store Dashboard.
The admin can then configure custom field groups using the ACF plugin. Once configured, these custom fields will automatically appear on the product creation and product editing pages inside the Store Dashboard.
This allows store owners to add additional product information based on the configured field types.
Open the field groups section #
To create and configure ACF fields, follow the steps below.
- Navigate to ACF from the WordPress admin menu
- Select Field Groups
This section contains all existing custom field groups configured on your site.
Create a new field group #
To create a new custom field group:
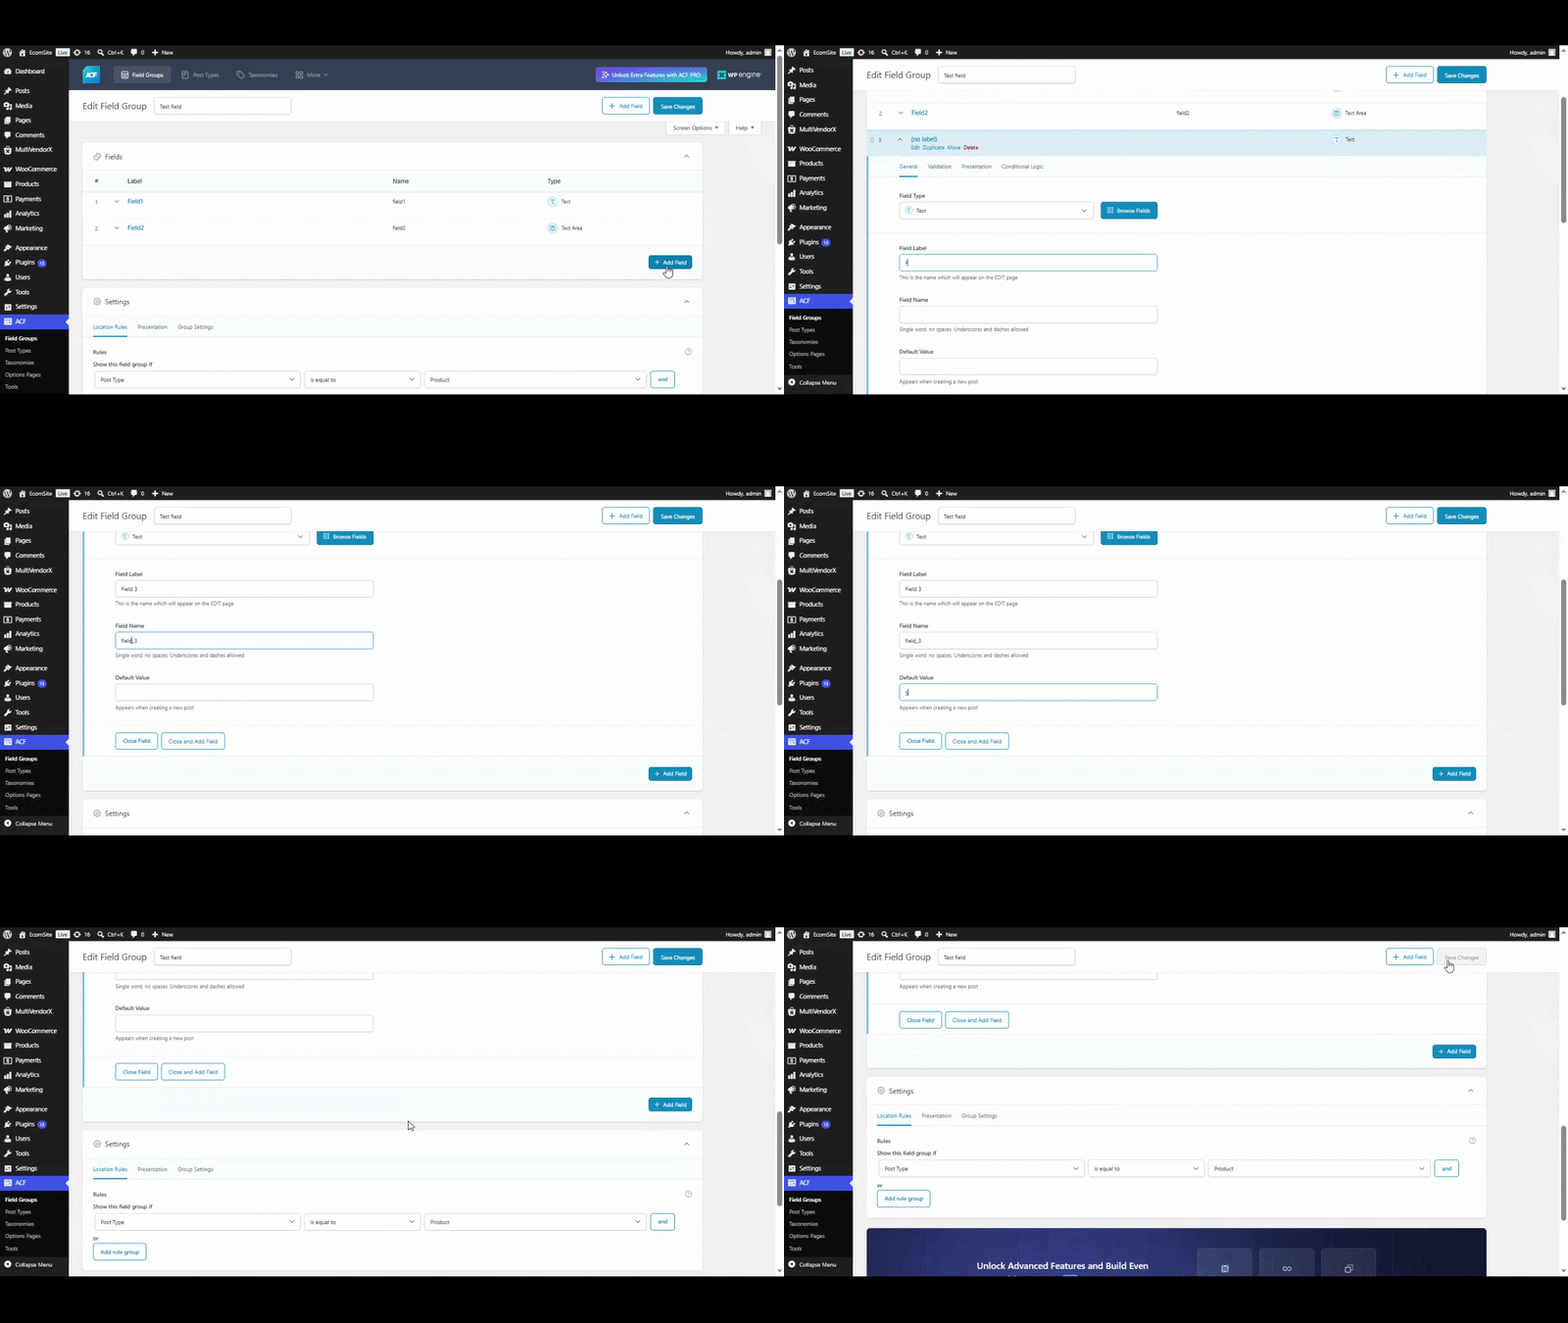
- Click Add Field Group or Add New
A new field group editor will open where you can start adding custom fields.
Add custom fields #
Inside the Field Group editor:
- Click the Add Field button
You can then configure the field settings by adding:
- Field Type
- Field Label
- Field Name
- Default Value
The selected field type determines how store owners will enter information while creating or editing products.
Configure the field location #
After creating the fields, configure where the fields should appear.
To display the fields on the product creation page:
- Go to the Location settings section
- Set the rule to:
- Post Type → is equal to → Product
This ensures the custom fields become visible inside the Store Dashboard product form.
Store owner workflow for using custom fields #
Once the admin completes the ACF field configuration, store owners will automatically be able to access those custom fields while creating or editing products from the Store Dashboard.
To use the custom fields:
- Log in to the Store Dashboard
- Navigate to Products
- Click Add Product or edit an existing product
After opening the product page:
- Add the standard product information
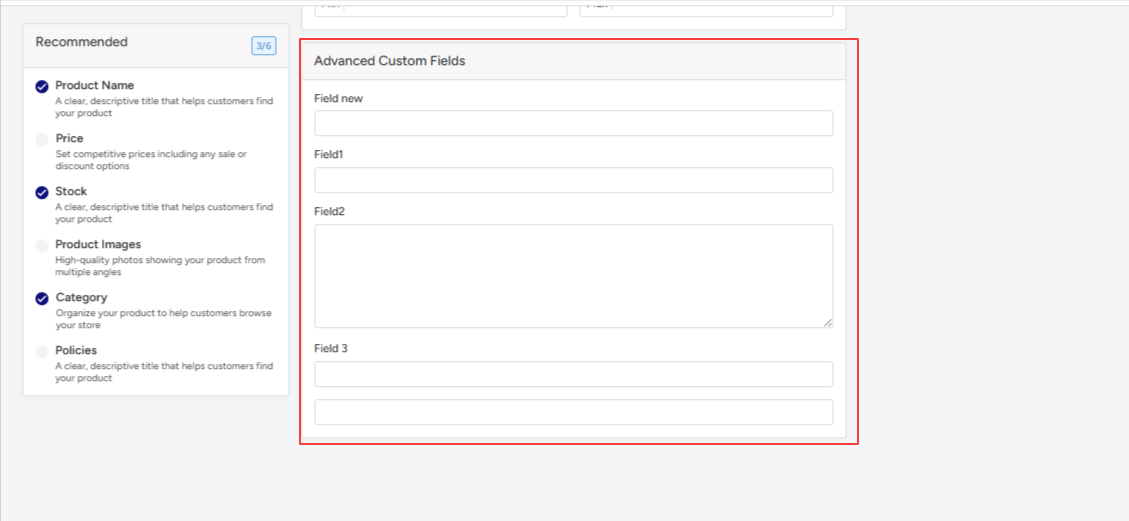
- Scroll down to locate the custom field section created through ACF
The displayed fields will vary depending on the field group and field types configured by the admin.
Store owners can then simply enter the required information into those fields while creating or updating the product. Once the product is saved, all custom field data is stored along with the product information and becomes available from the backend product details page.
ACF will carry on how to display the custom fields in the product page. For this you need to follow their document .