
")


Brief Description #
WooCommerce stock alert plugin helps improve customer satisfaction and potentially increase sales by keeping interested customers informed about product availability, particularly for items that were previously out of stock. This can lead to higher customer retention and a more positive shopping experience.
Requirement #
Configuration from admin dashboard #
Let us first discuss about the configuration from the admin end. For the configuration of the free settings, kindly go through our doc here –
Settings #
To configure different settings for WooCommerce stock alert pro you just need follow the below mentioned steps –
- Go to admin dashboard, and hover down to Stock alert from the navigation bar
- Once the submenu list appears, click on settings and get started with the configuration of the below mentioned settings.
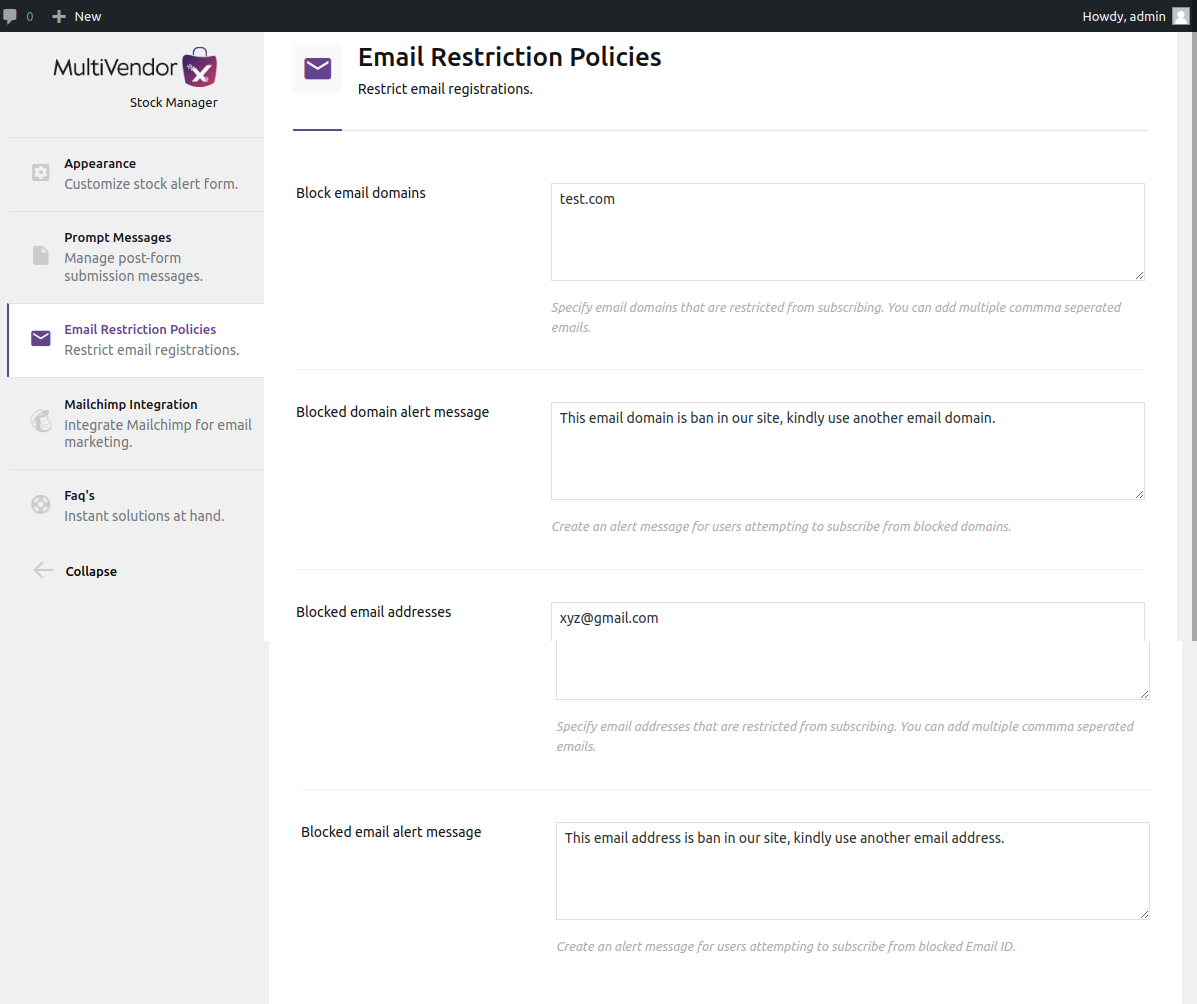
Email Restriction Policies #
Here in this section the admin can configure different settings related to the restriction of email registration.
- Block Email Domains – Enter the email domains here that you want to be banned on your site. That means the user will not be able to subscribe for a product with that email domain.
- Blocked domain alert message – Enter the text that you want to be displayed for banned emails on the frontend.
- Blocked email addresses – Enter the specific email addresses that you want to ban from subscribing for a product on your site.
- Blocked email alert message – Here enter the text that will be displayed when someone tries to subscribe with a banned email address.
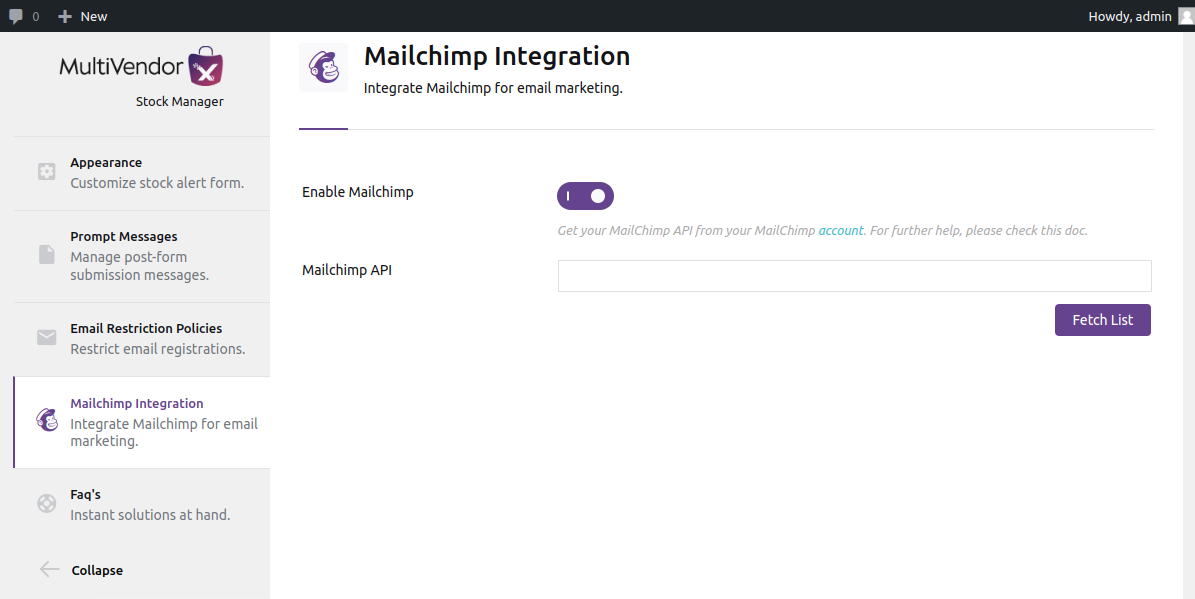
Mailchimp Integration #
Enable Mailchimp – Once this option is enabled, the admin will get the below options.
- Mailchimp API – By putting the Mailchimp API the admin can connect their mailchimp account here for email marketing through Mailchimp.
To generate an API key, follow these steps.
- Navigate to the API Key section of your account.
- Click Create New Key.
- Name your key. Be descriptive, so you know what app uses that key. Keep in mind that you’ll see only this name and the first 4 key digits on your list of API keys.
- Click Generate Key.
- Once we generate your key, click Copy Key to Clipboard. Save your key someplace secure–you won’t be able to see or copy it again. If you lose this key, you’ll need to generate a new key and update any integration that uses it.
- Click Done.
- Mailchimp List – From here the admin can select the mailchimp list for email marketing.
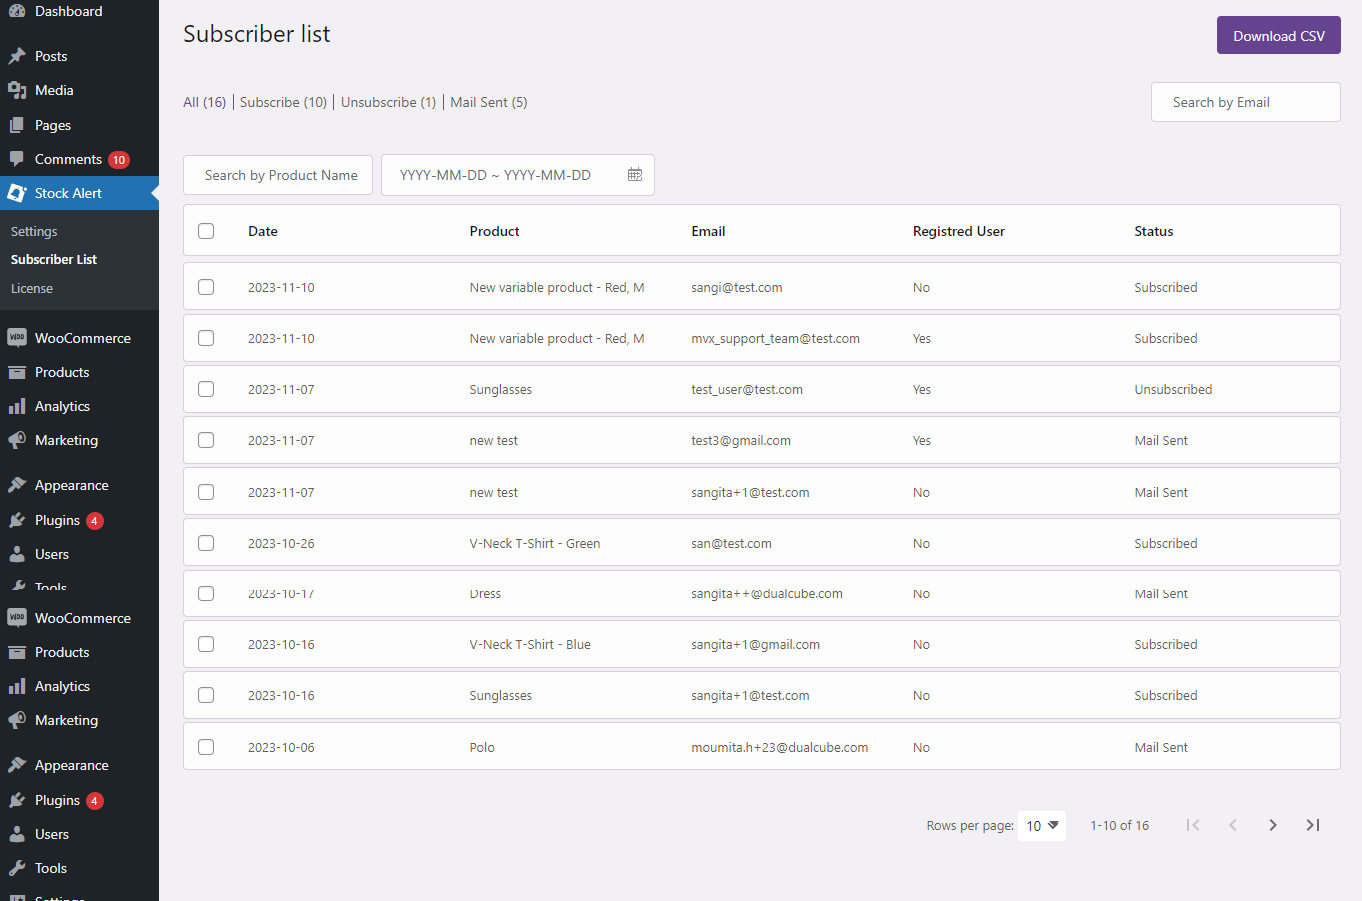
Subscriber list #
From this submenu the admin can see the list of subscribers who have subscribed for different out of stock products.
Here the admin can search for subscribers by name, entering a date range or by putting emails.
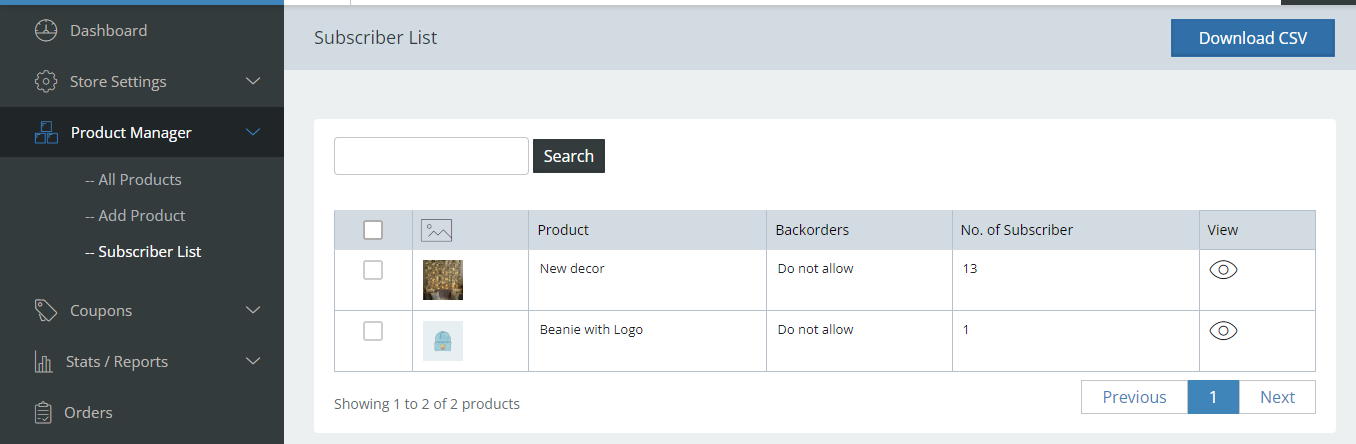
Note – For a multivendor site, the vendors of the site can also see the subscriber list for the out of stock product of his store from their vendor dashboard and also view the list of subscribers.
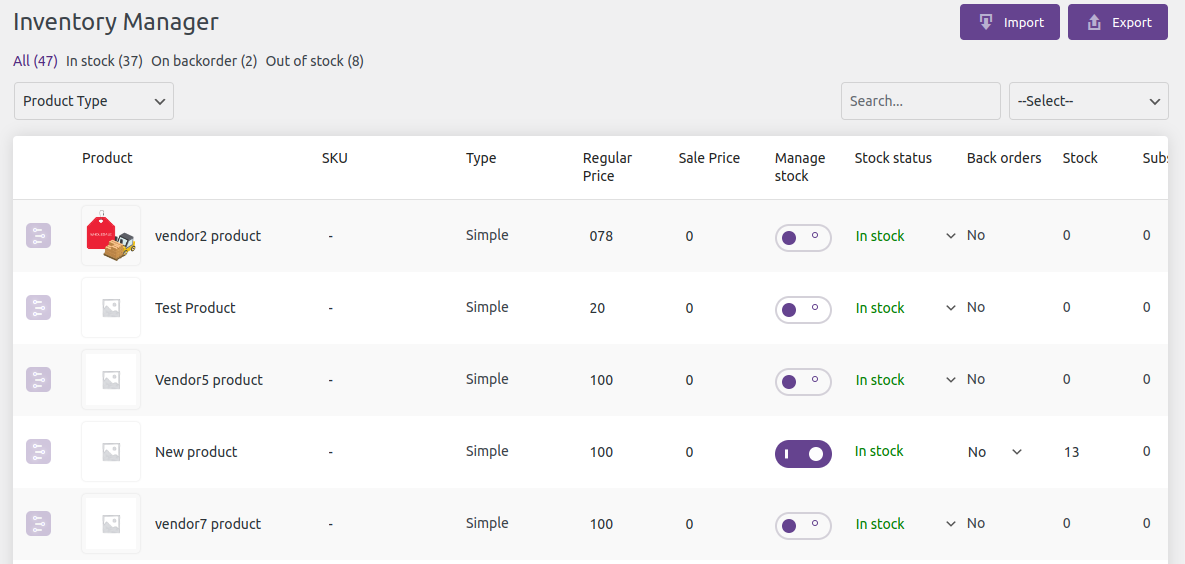
Inventory Manager #
Gain access to a dedicated inventory manager page where you, as the site administrator, can effortlessly monitor and update product inventory. This feature allows you to view key product details, including:
- Product image
- Product name
- Product SKU
- Product type
- Pricing information
- Current stock status
- Backorder quantities, and more
Flow of stock alert from the User end #
Now let us discuss about the flow of stock alert from the user/subscriber end –
- The user can simply subscribe to an out of stock product by going to the single product page.
- Once done subscribing, they will receive an email regarding the same.
- They can also learn about the out of stock products they have subscribed to from the Registration Status section in the My account page.
- When their subscribed product is again back on stock, they will receive a email about that accordingly.


